Have you ever wanted to spend some quality time with your talented husband, hoping it will bring you even closer together than you already are? Then skip this article. IN THE BEGINNING We did a minor remodel of a small pop-up camper, some paint and cushion recovering. Nothing big, took maybe a weekend. We got a lot of good use out of it, but our boys were growing, and we needed more space. So we sold the pop-up and found a great deal (or so we thought) on a 1979 Prowler, twenty-two foot home away from home.

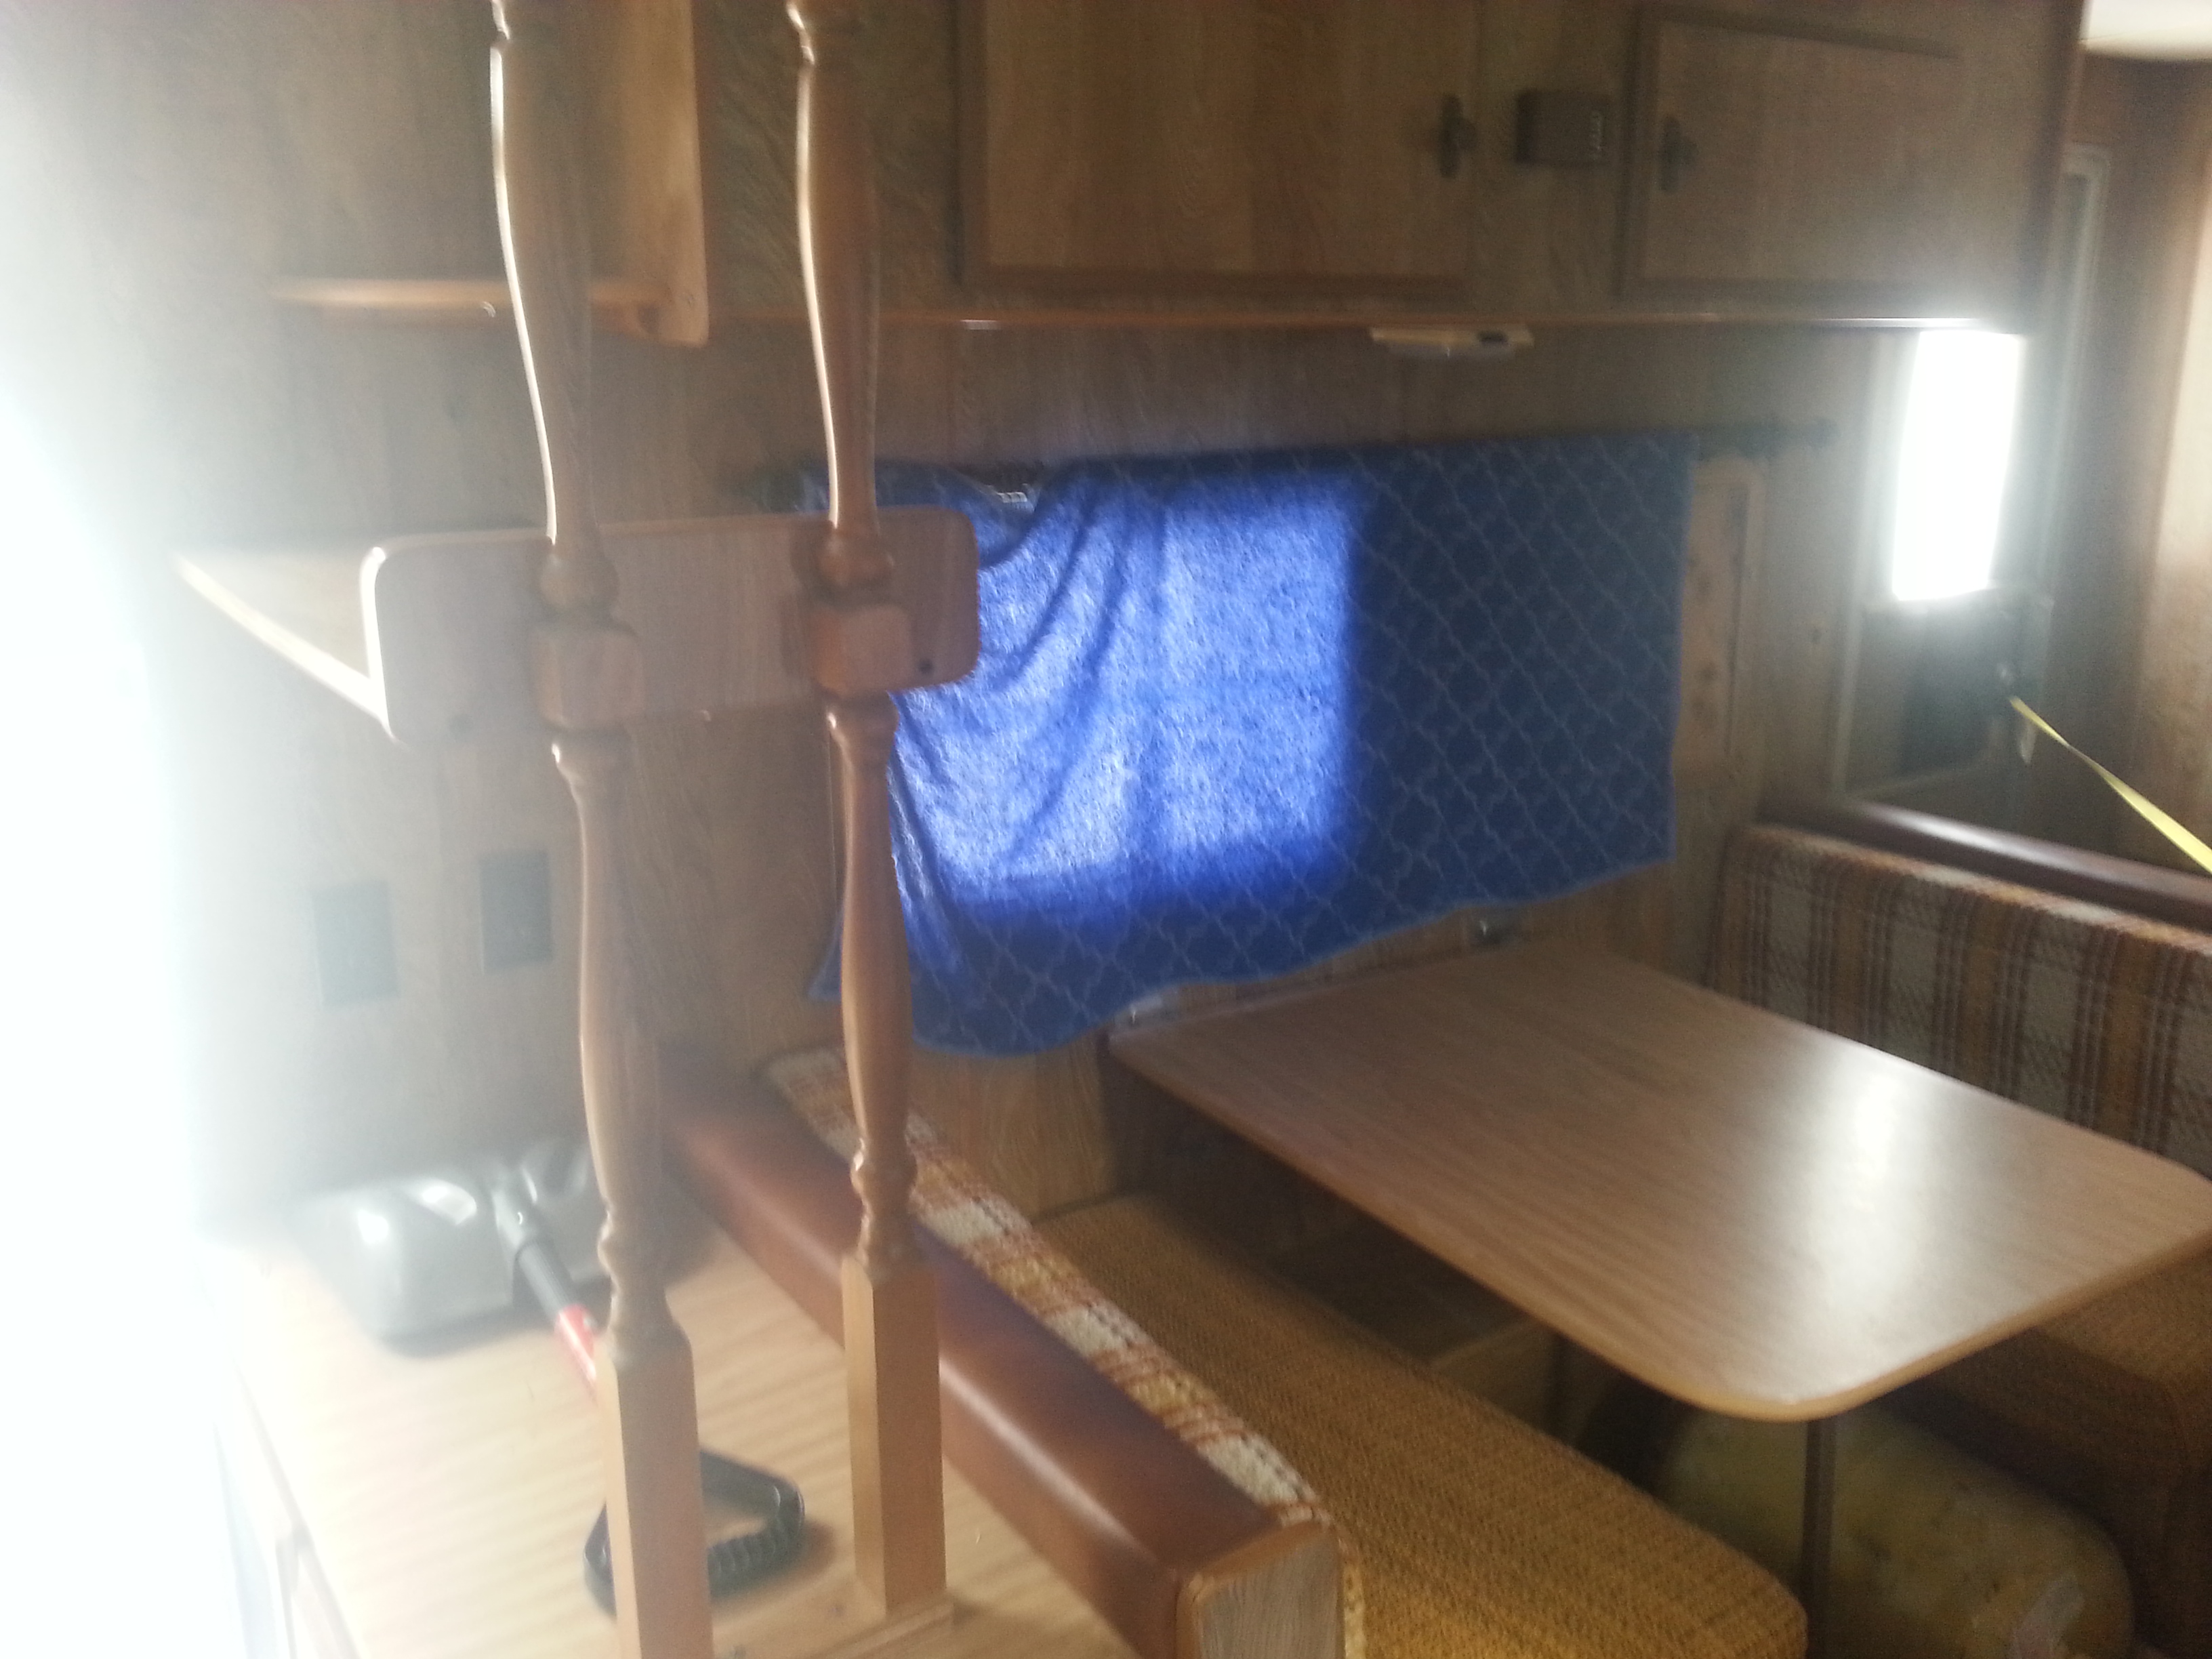
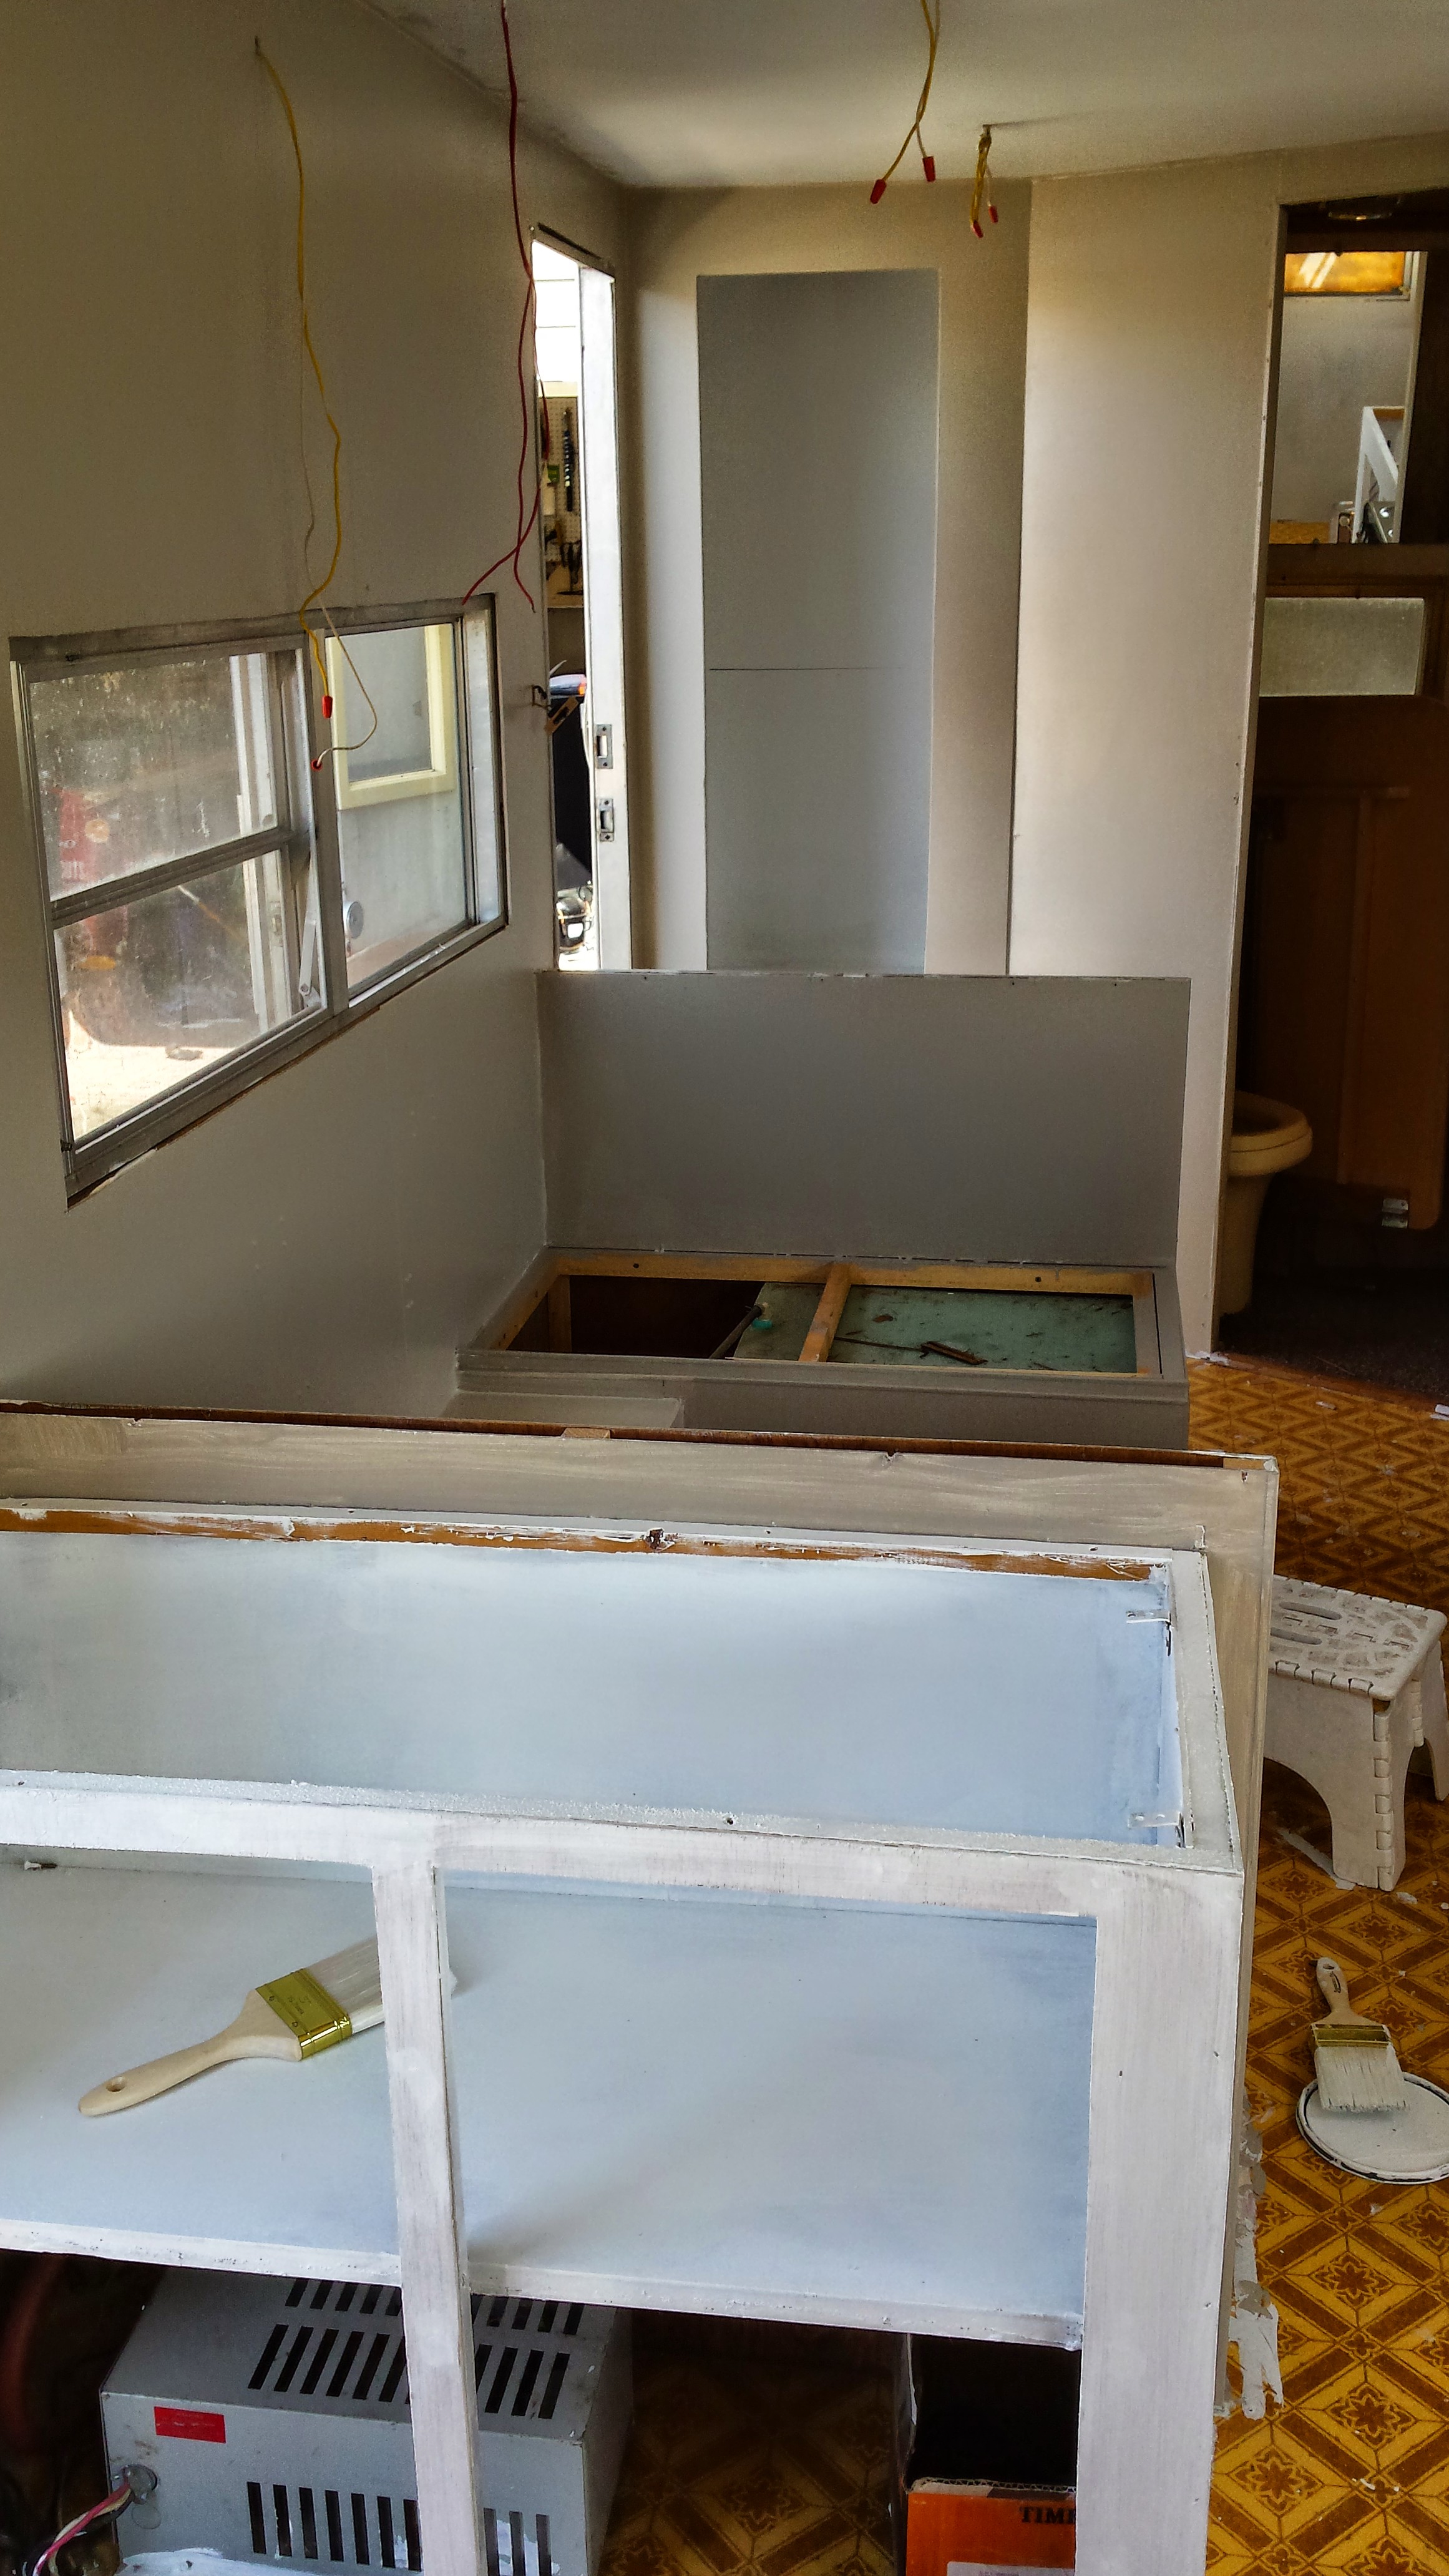
The seller told us he had used it for hunting but everything worked. He had taken out the couch and put in a queen-sized mattress. We thought it was a steal, and then we got it home…. DEMOLITION My husband pulled out the mattress and noticed some water spots in the upper front corner. He started pulling out the paneling and the water damage is was much more extensive. Hubby started demolishing everything. At one point, I was convinced he was just doing it because he was connecting to his inner destructive child.

 Beginning of demo Here’s what the beast looked like when we started..


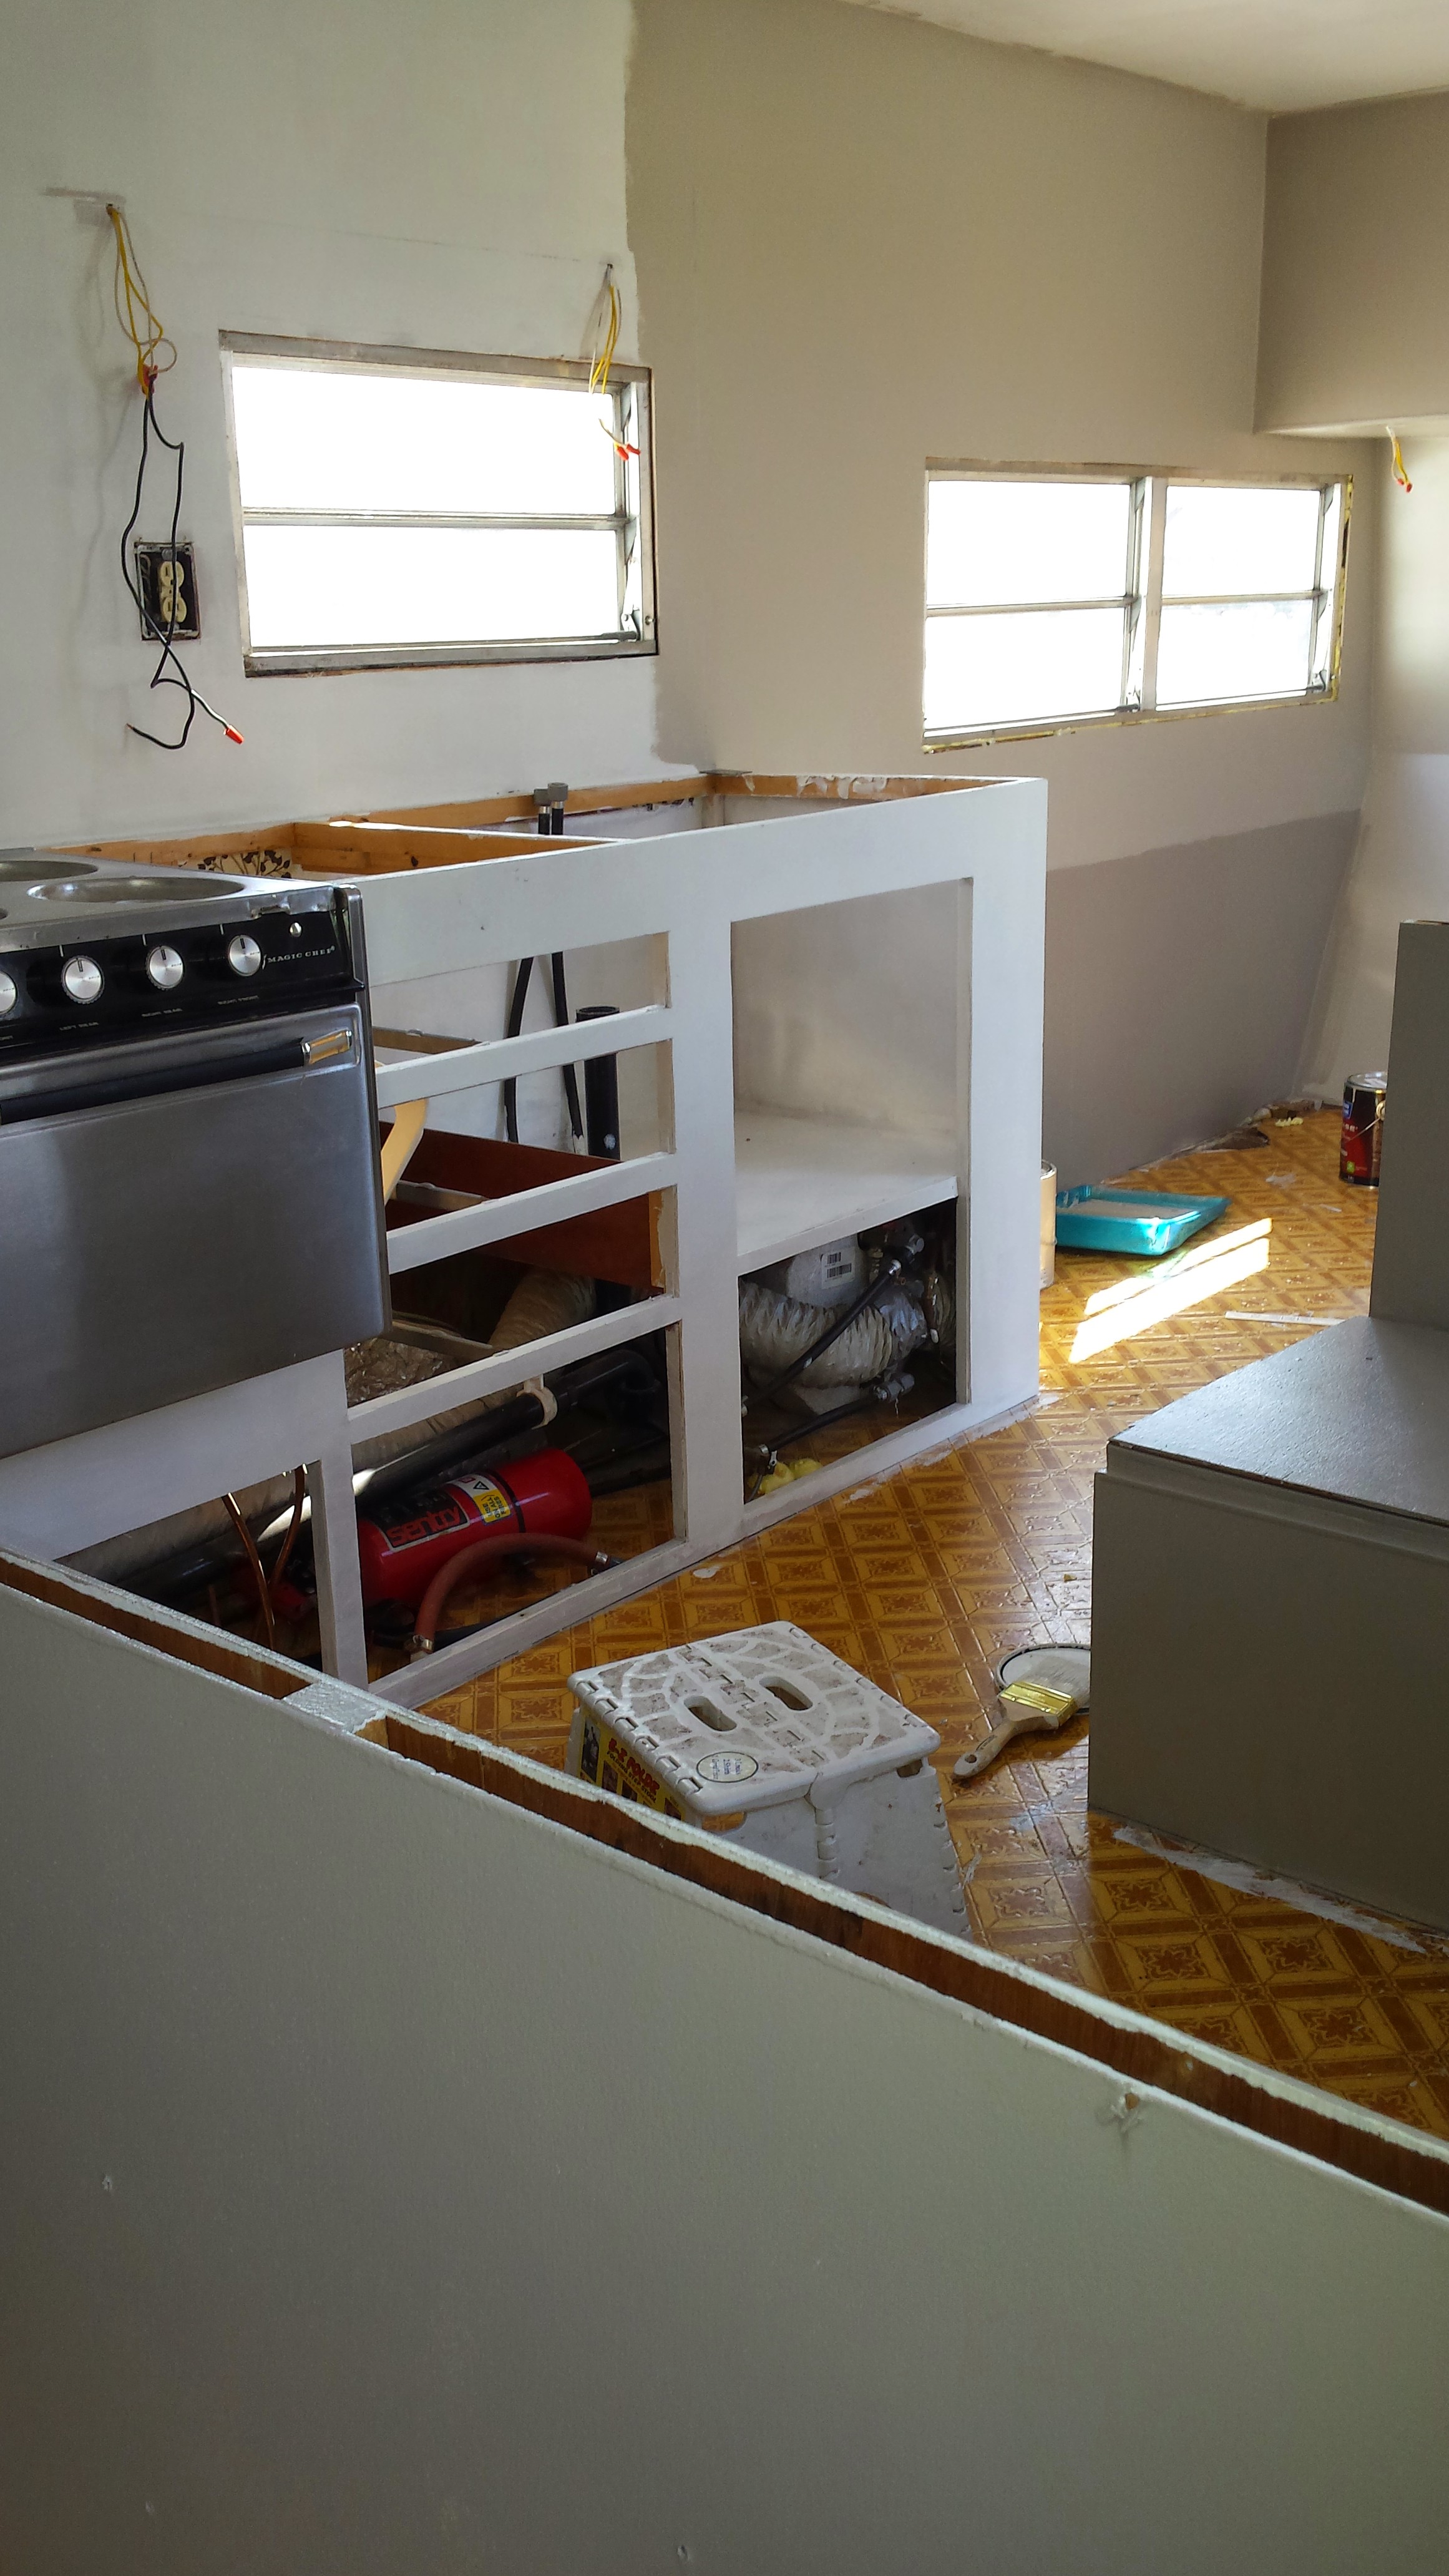
And the demolition kept going and going… 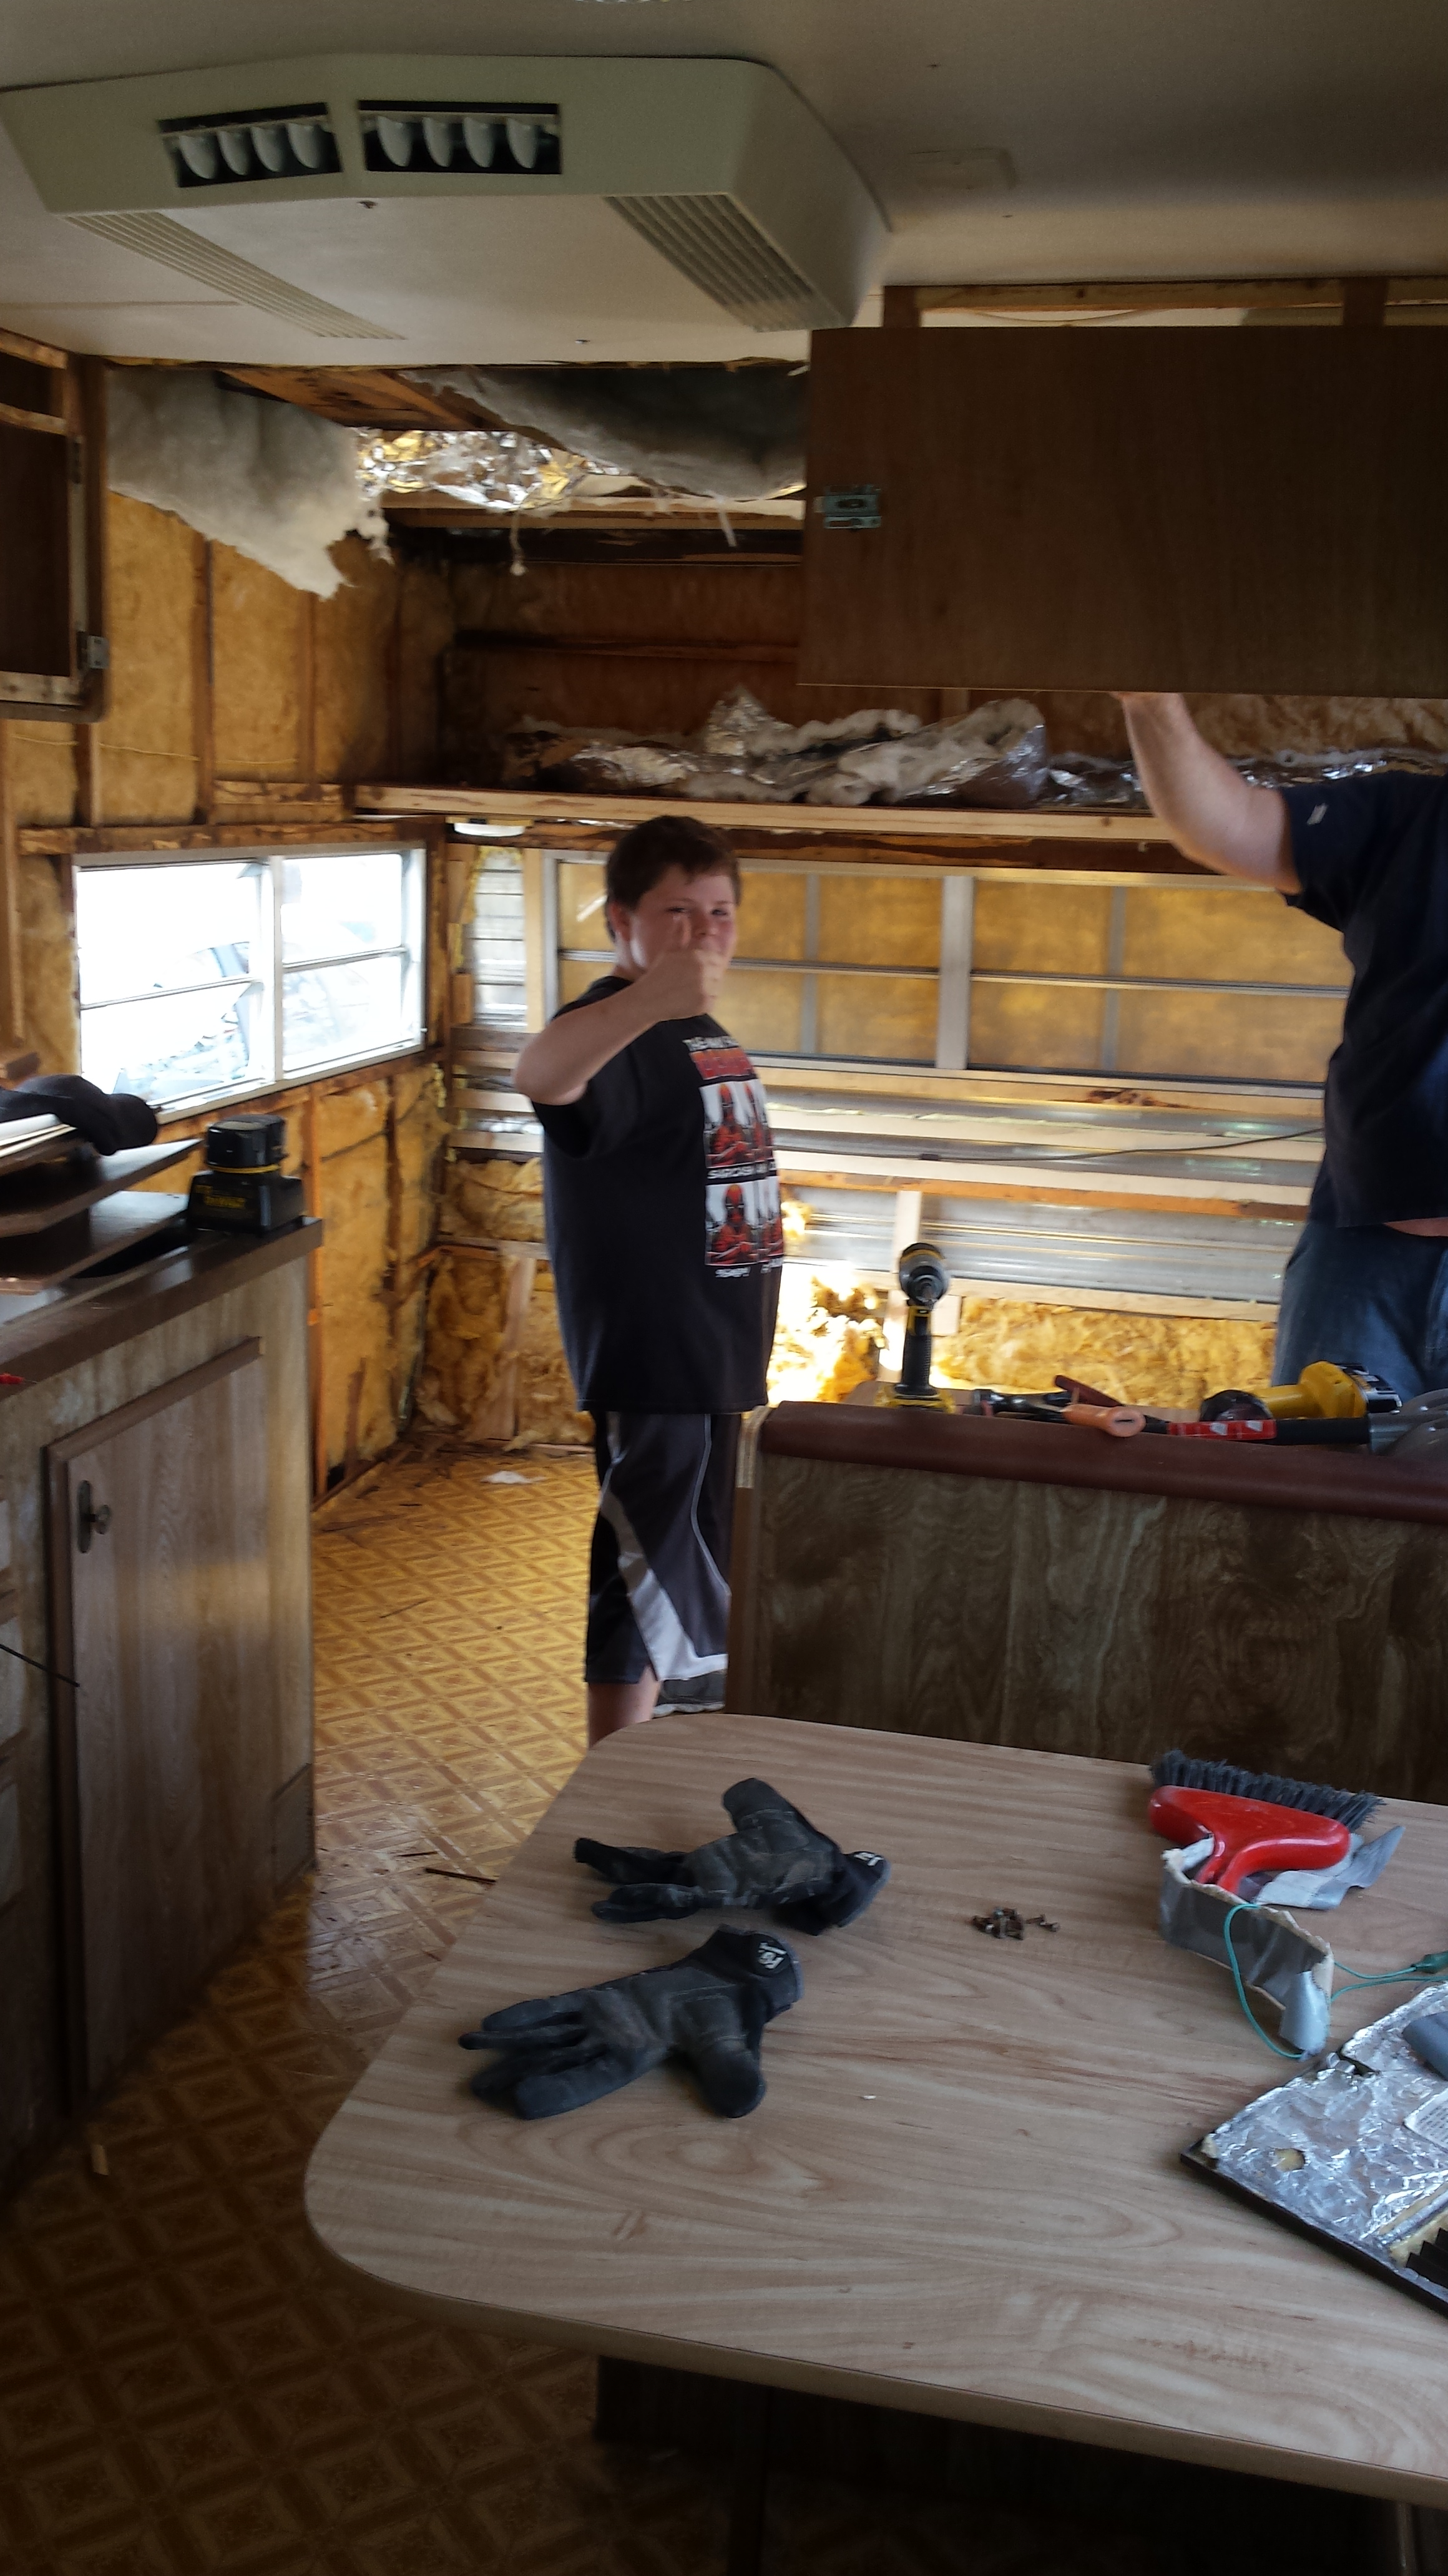

And going….
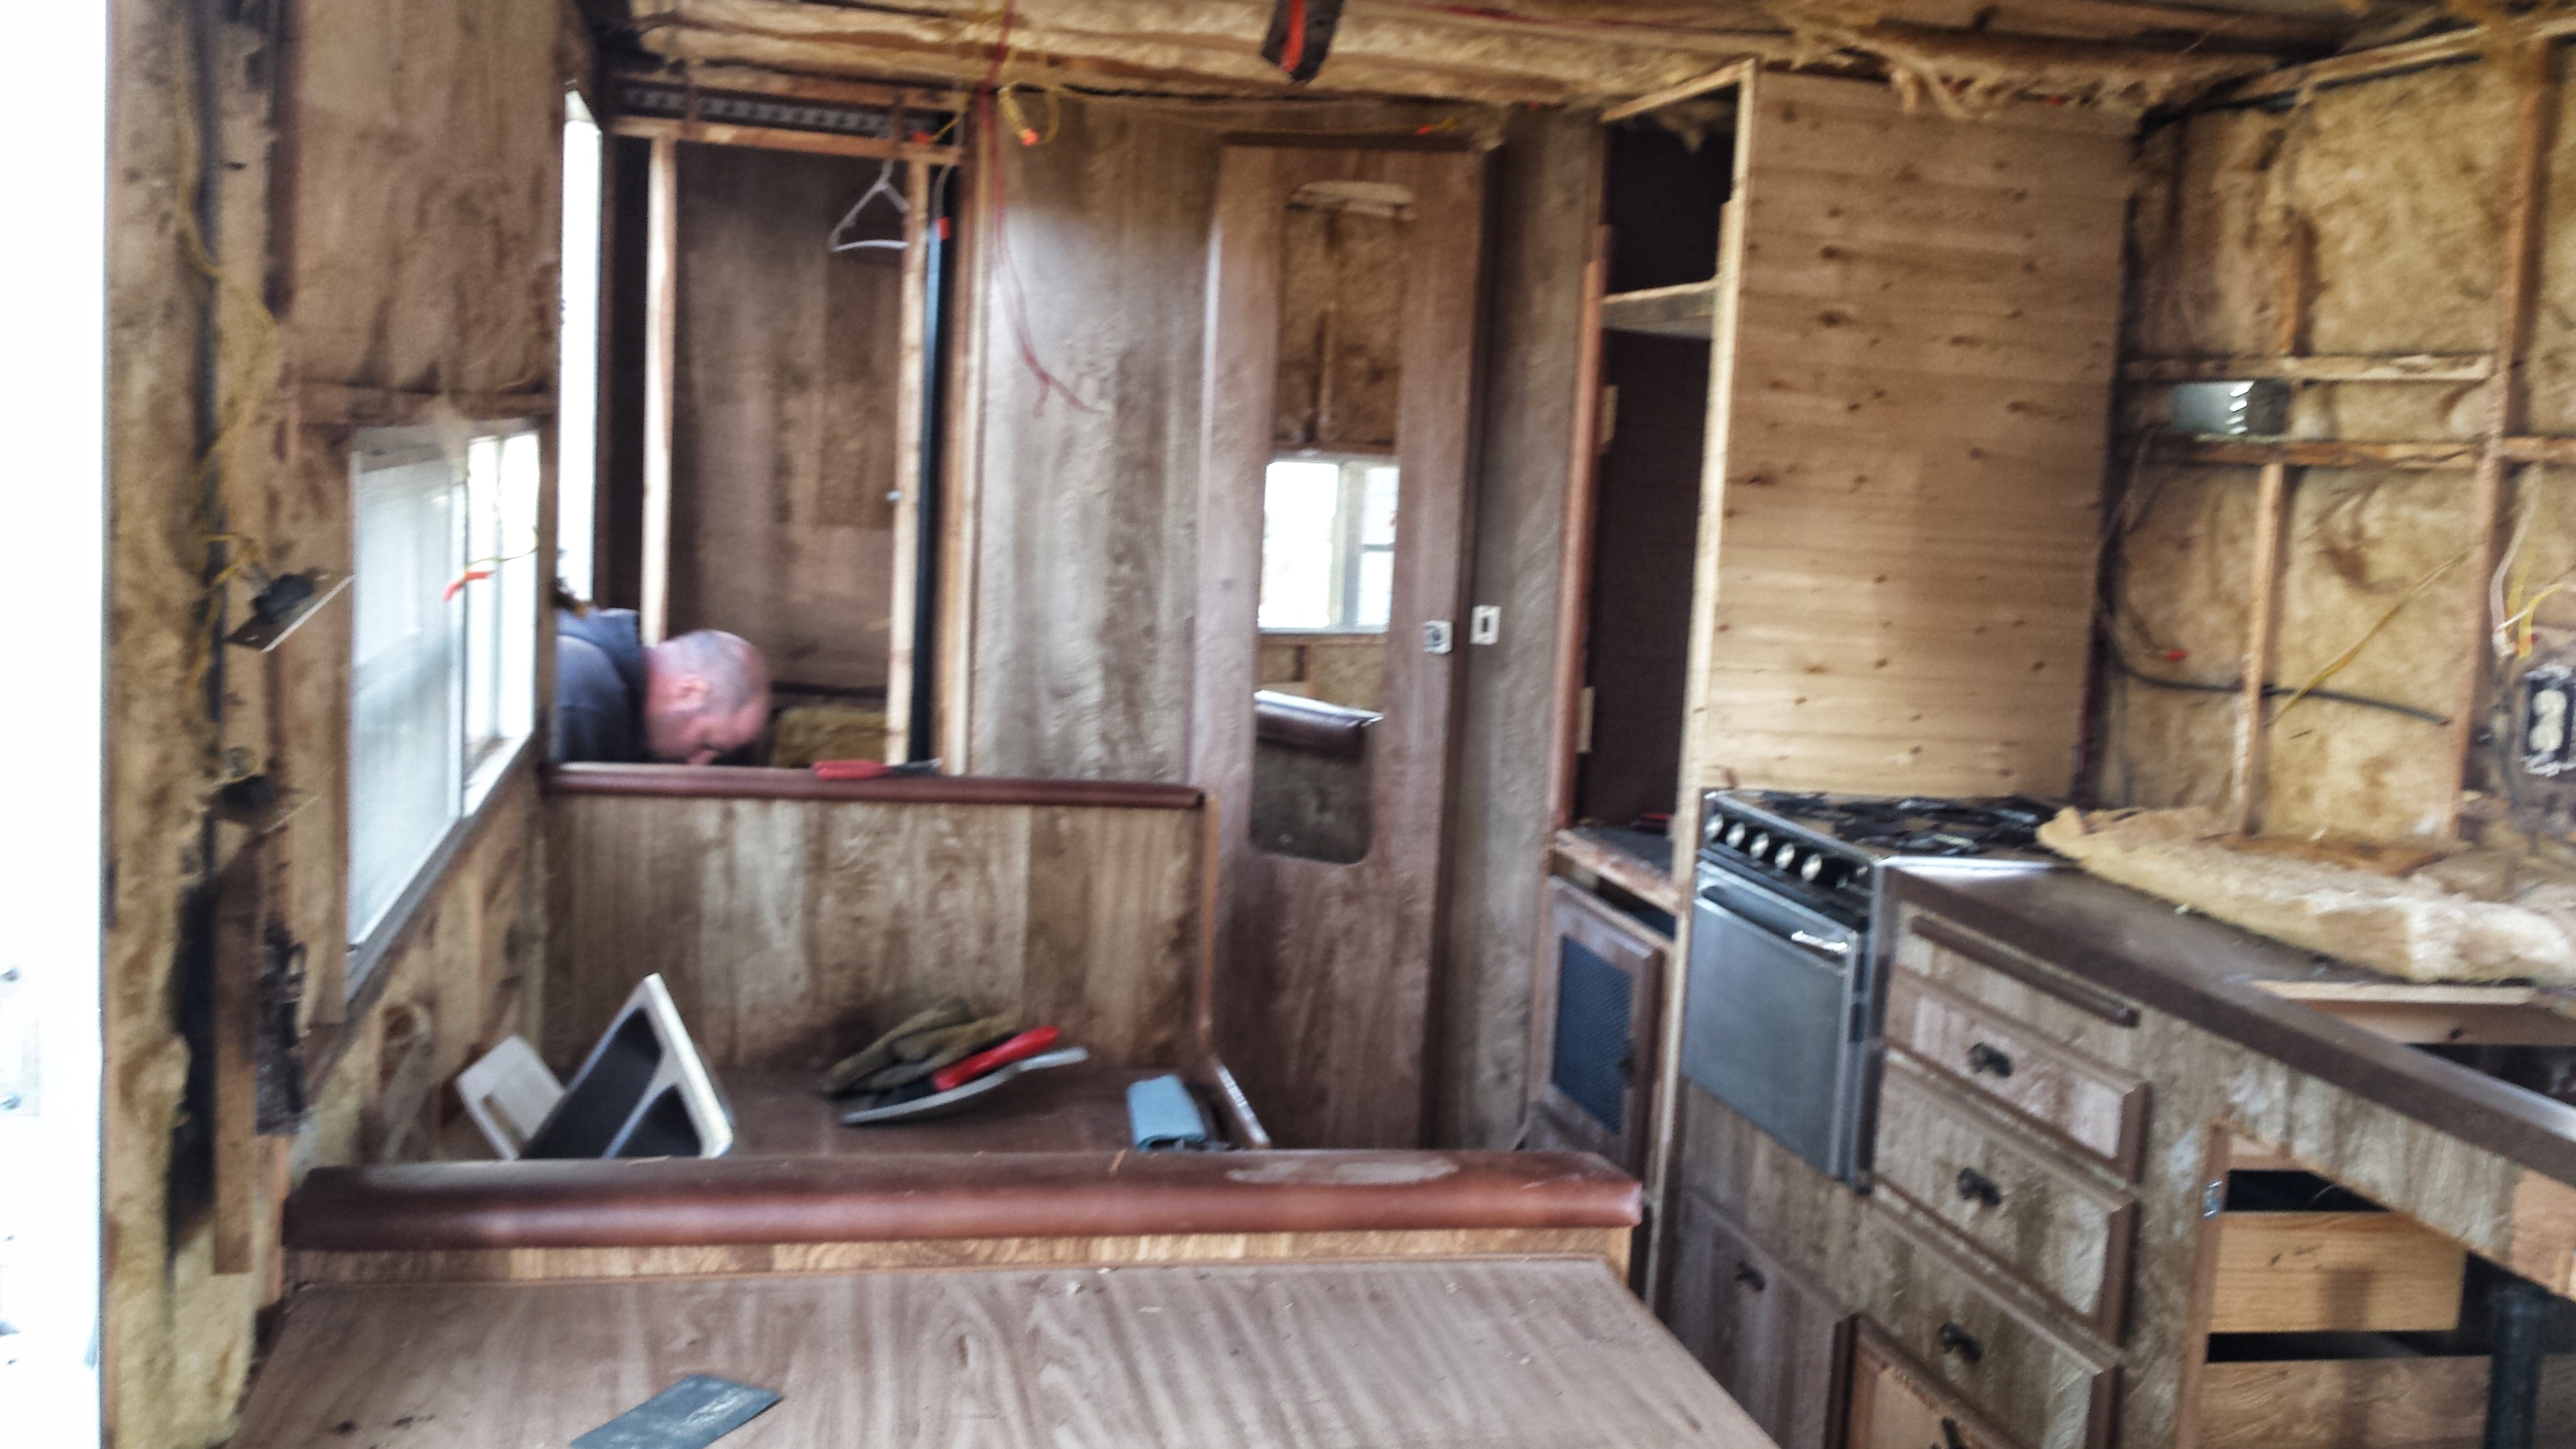


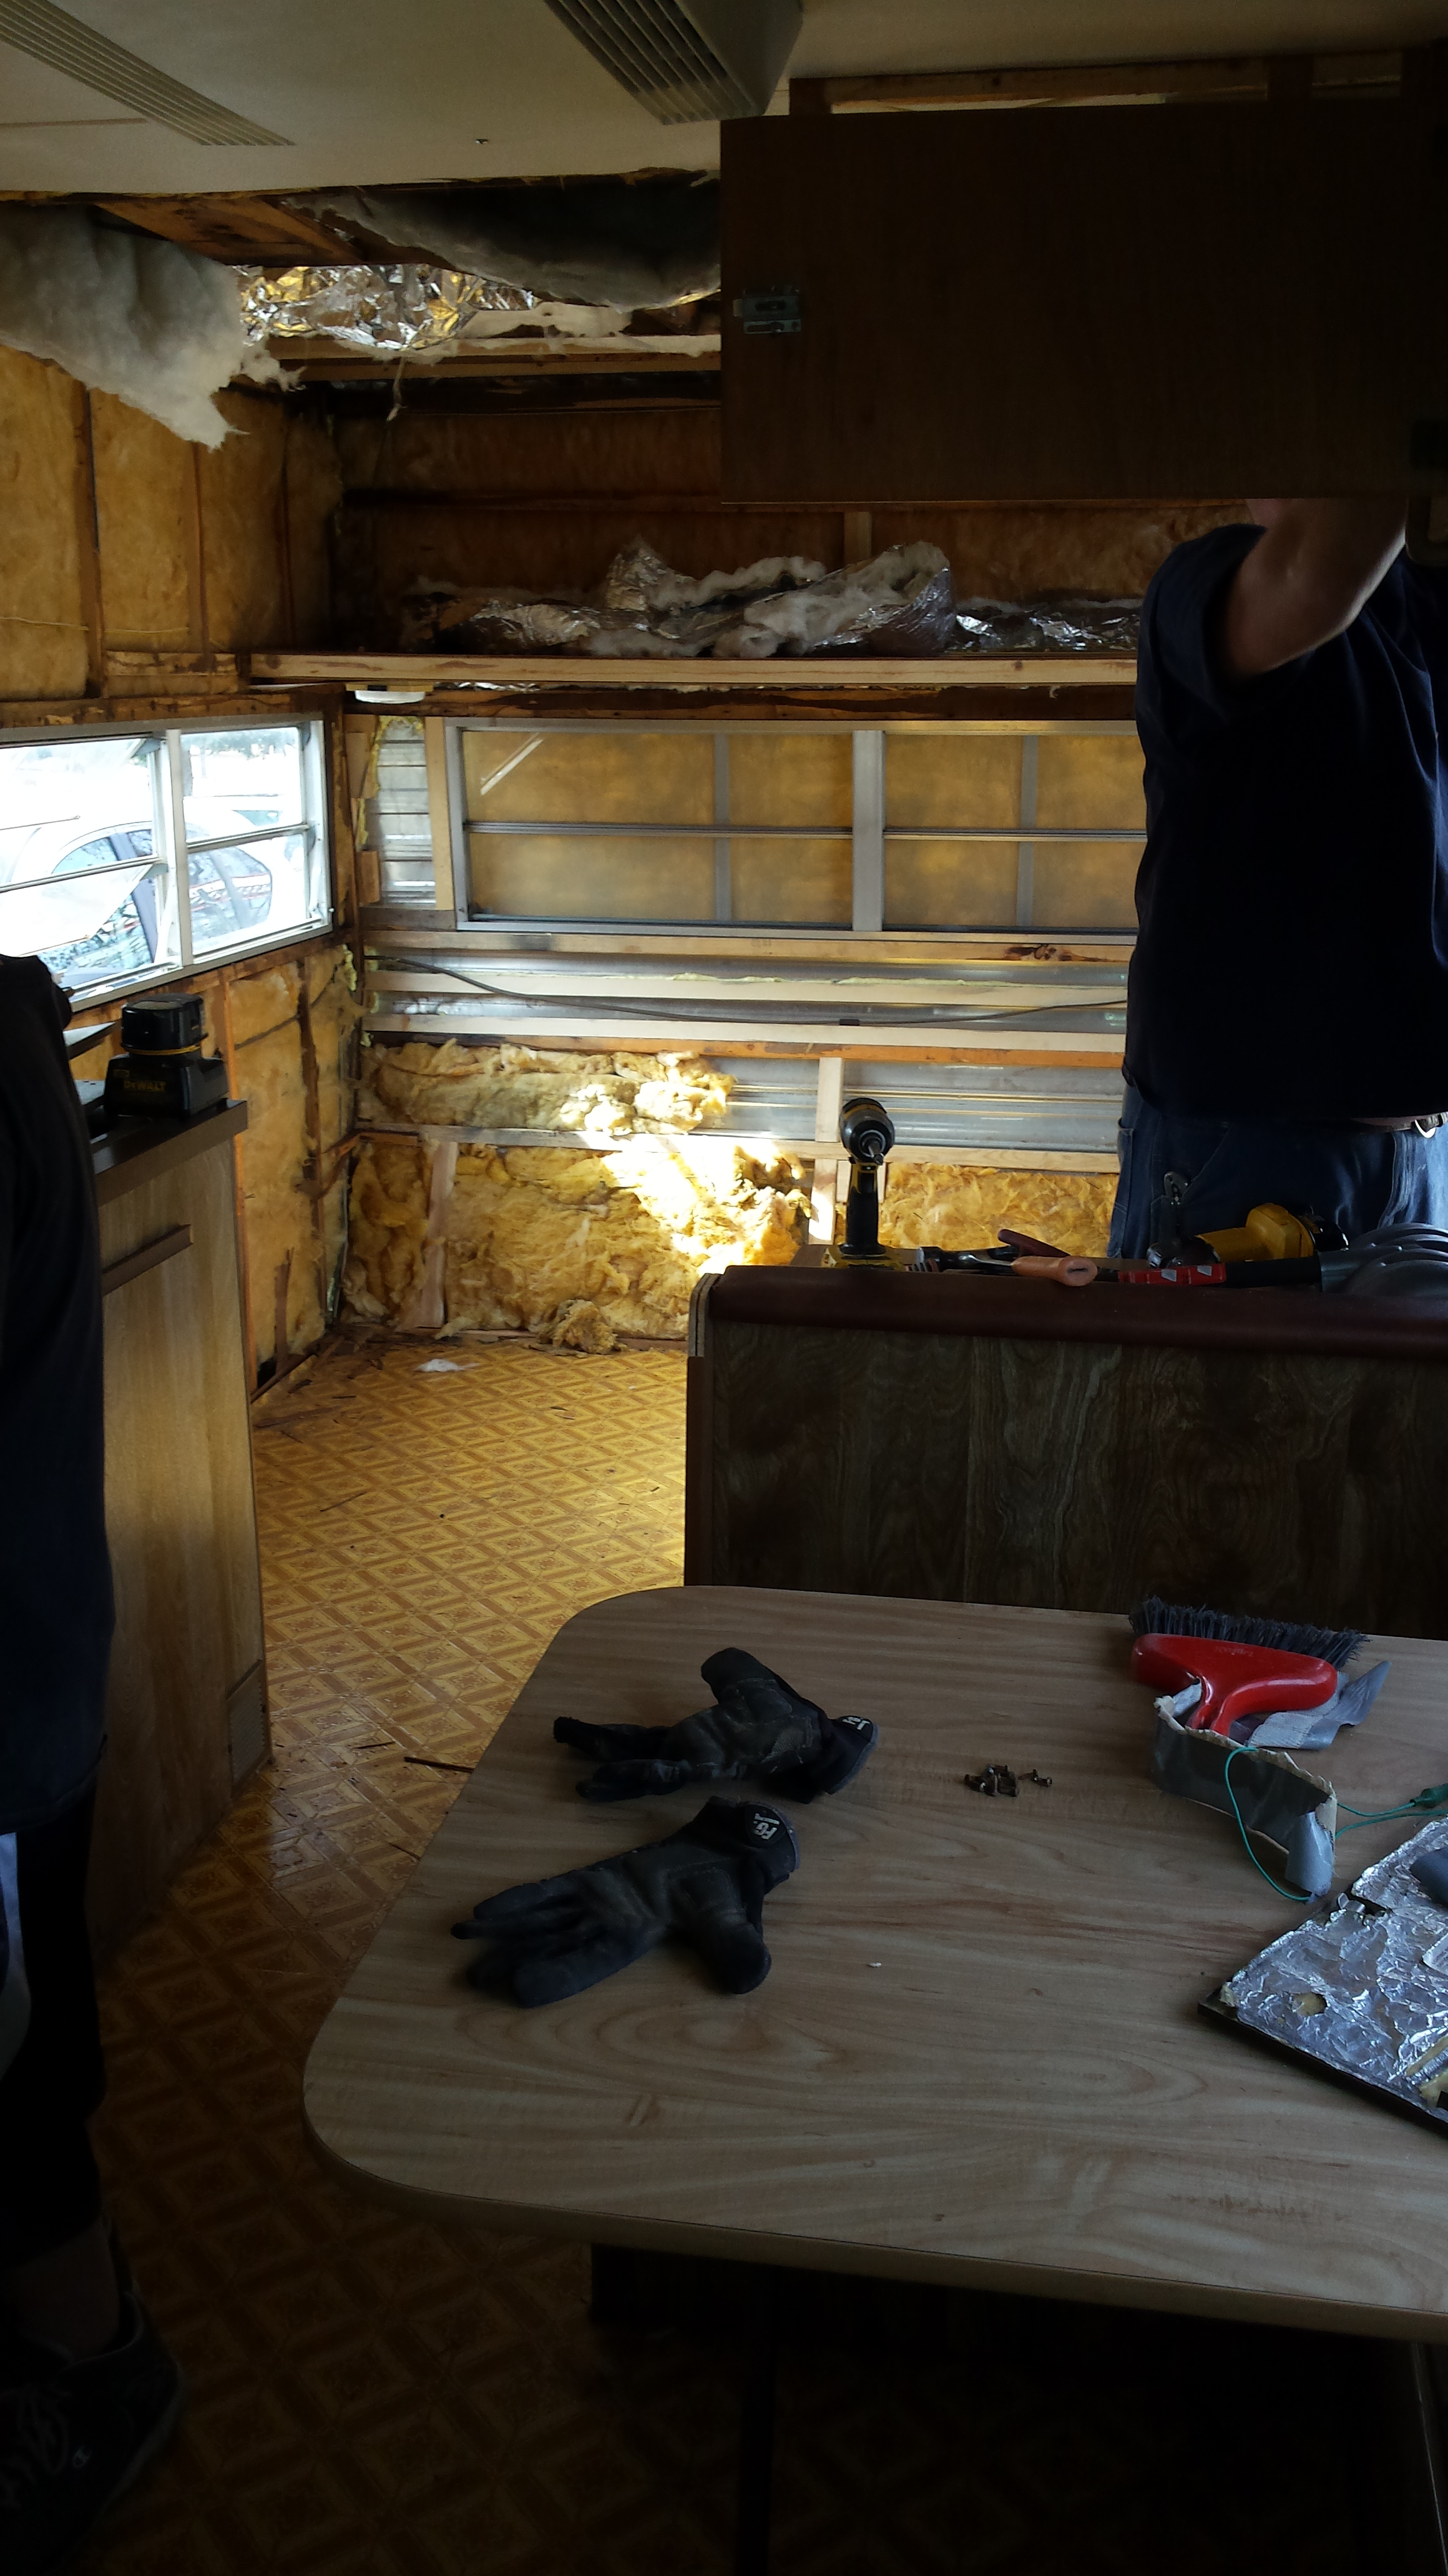
I don’t know why, but hubby got to demo and all I got to do was clean up after him. Several times. Just like everyday. Anyway….next step was caulking leaks, and replacing the walls we tore out. We found sheets of paneling called “luan.” Did I mention my husband is a handyman? For real. That’s his job. It helps.


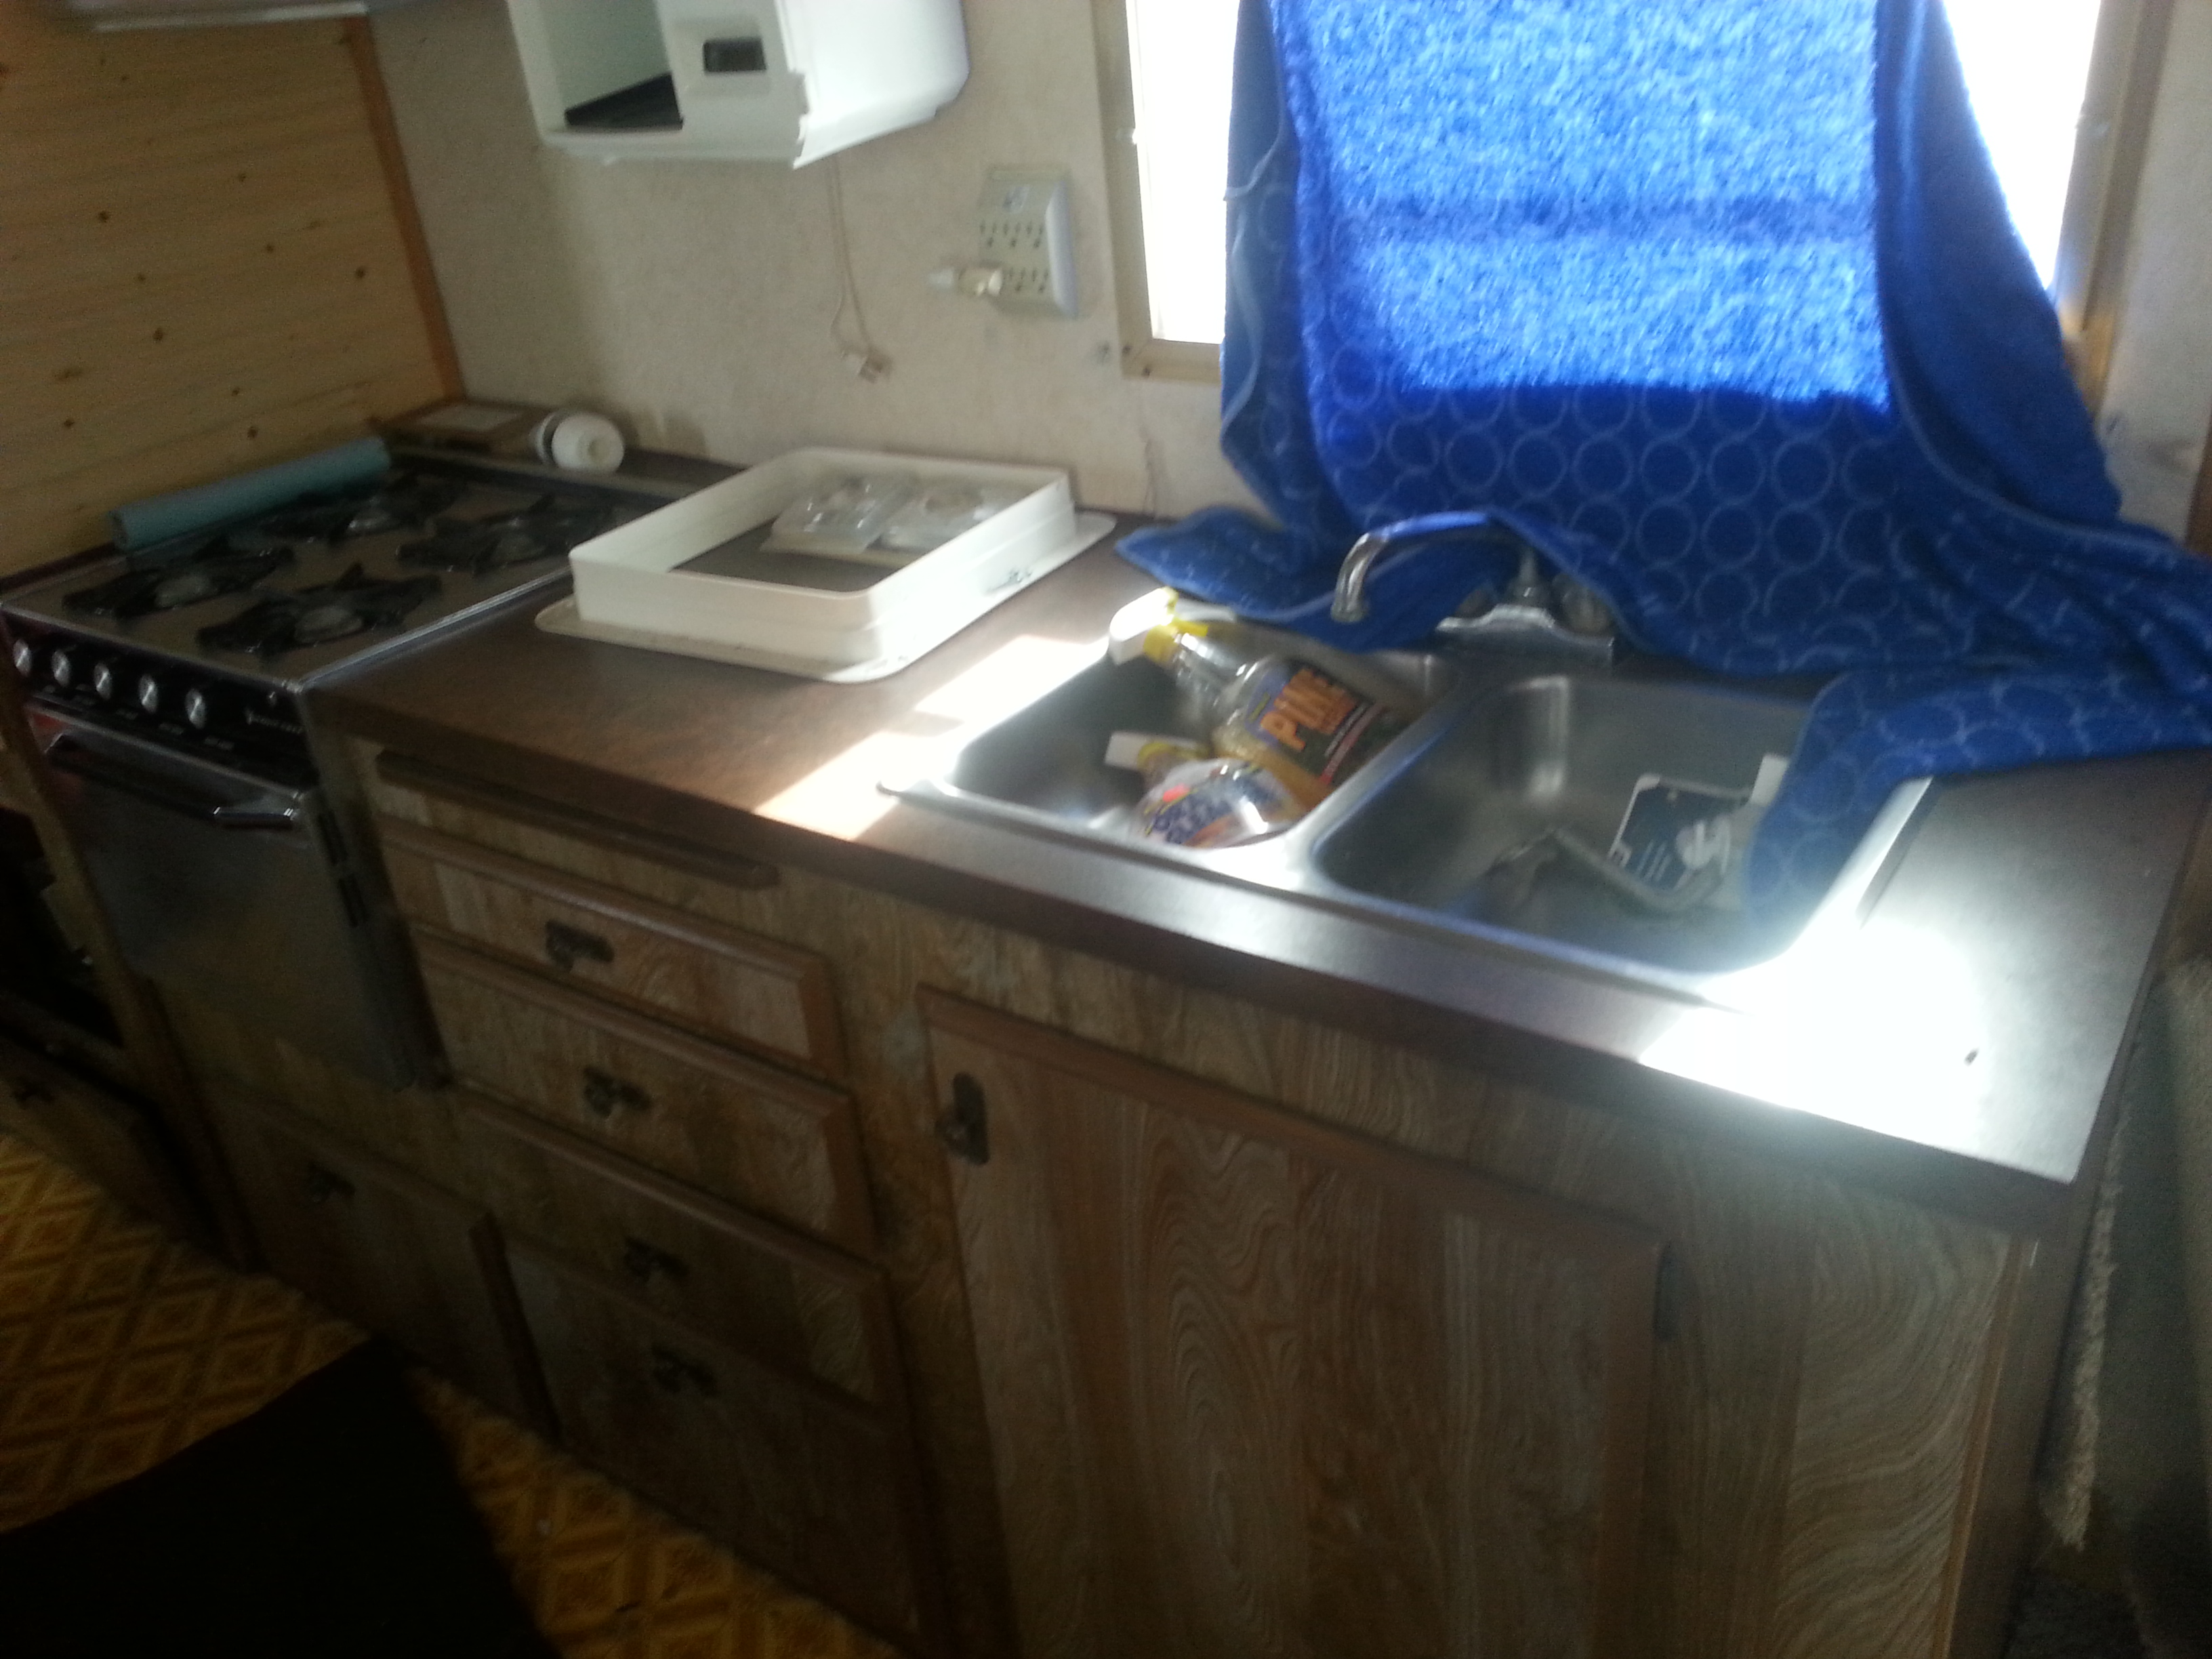
Yes, even pulled the sink, cupboards and table out.
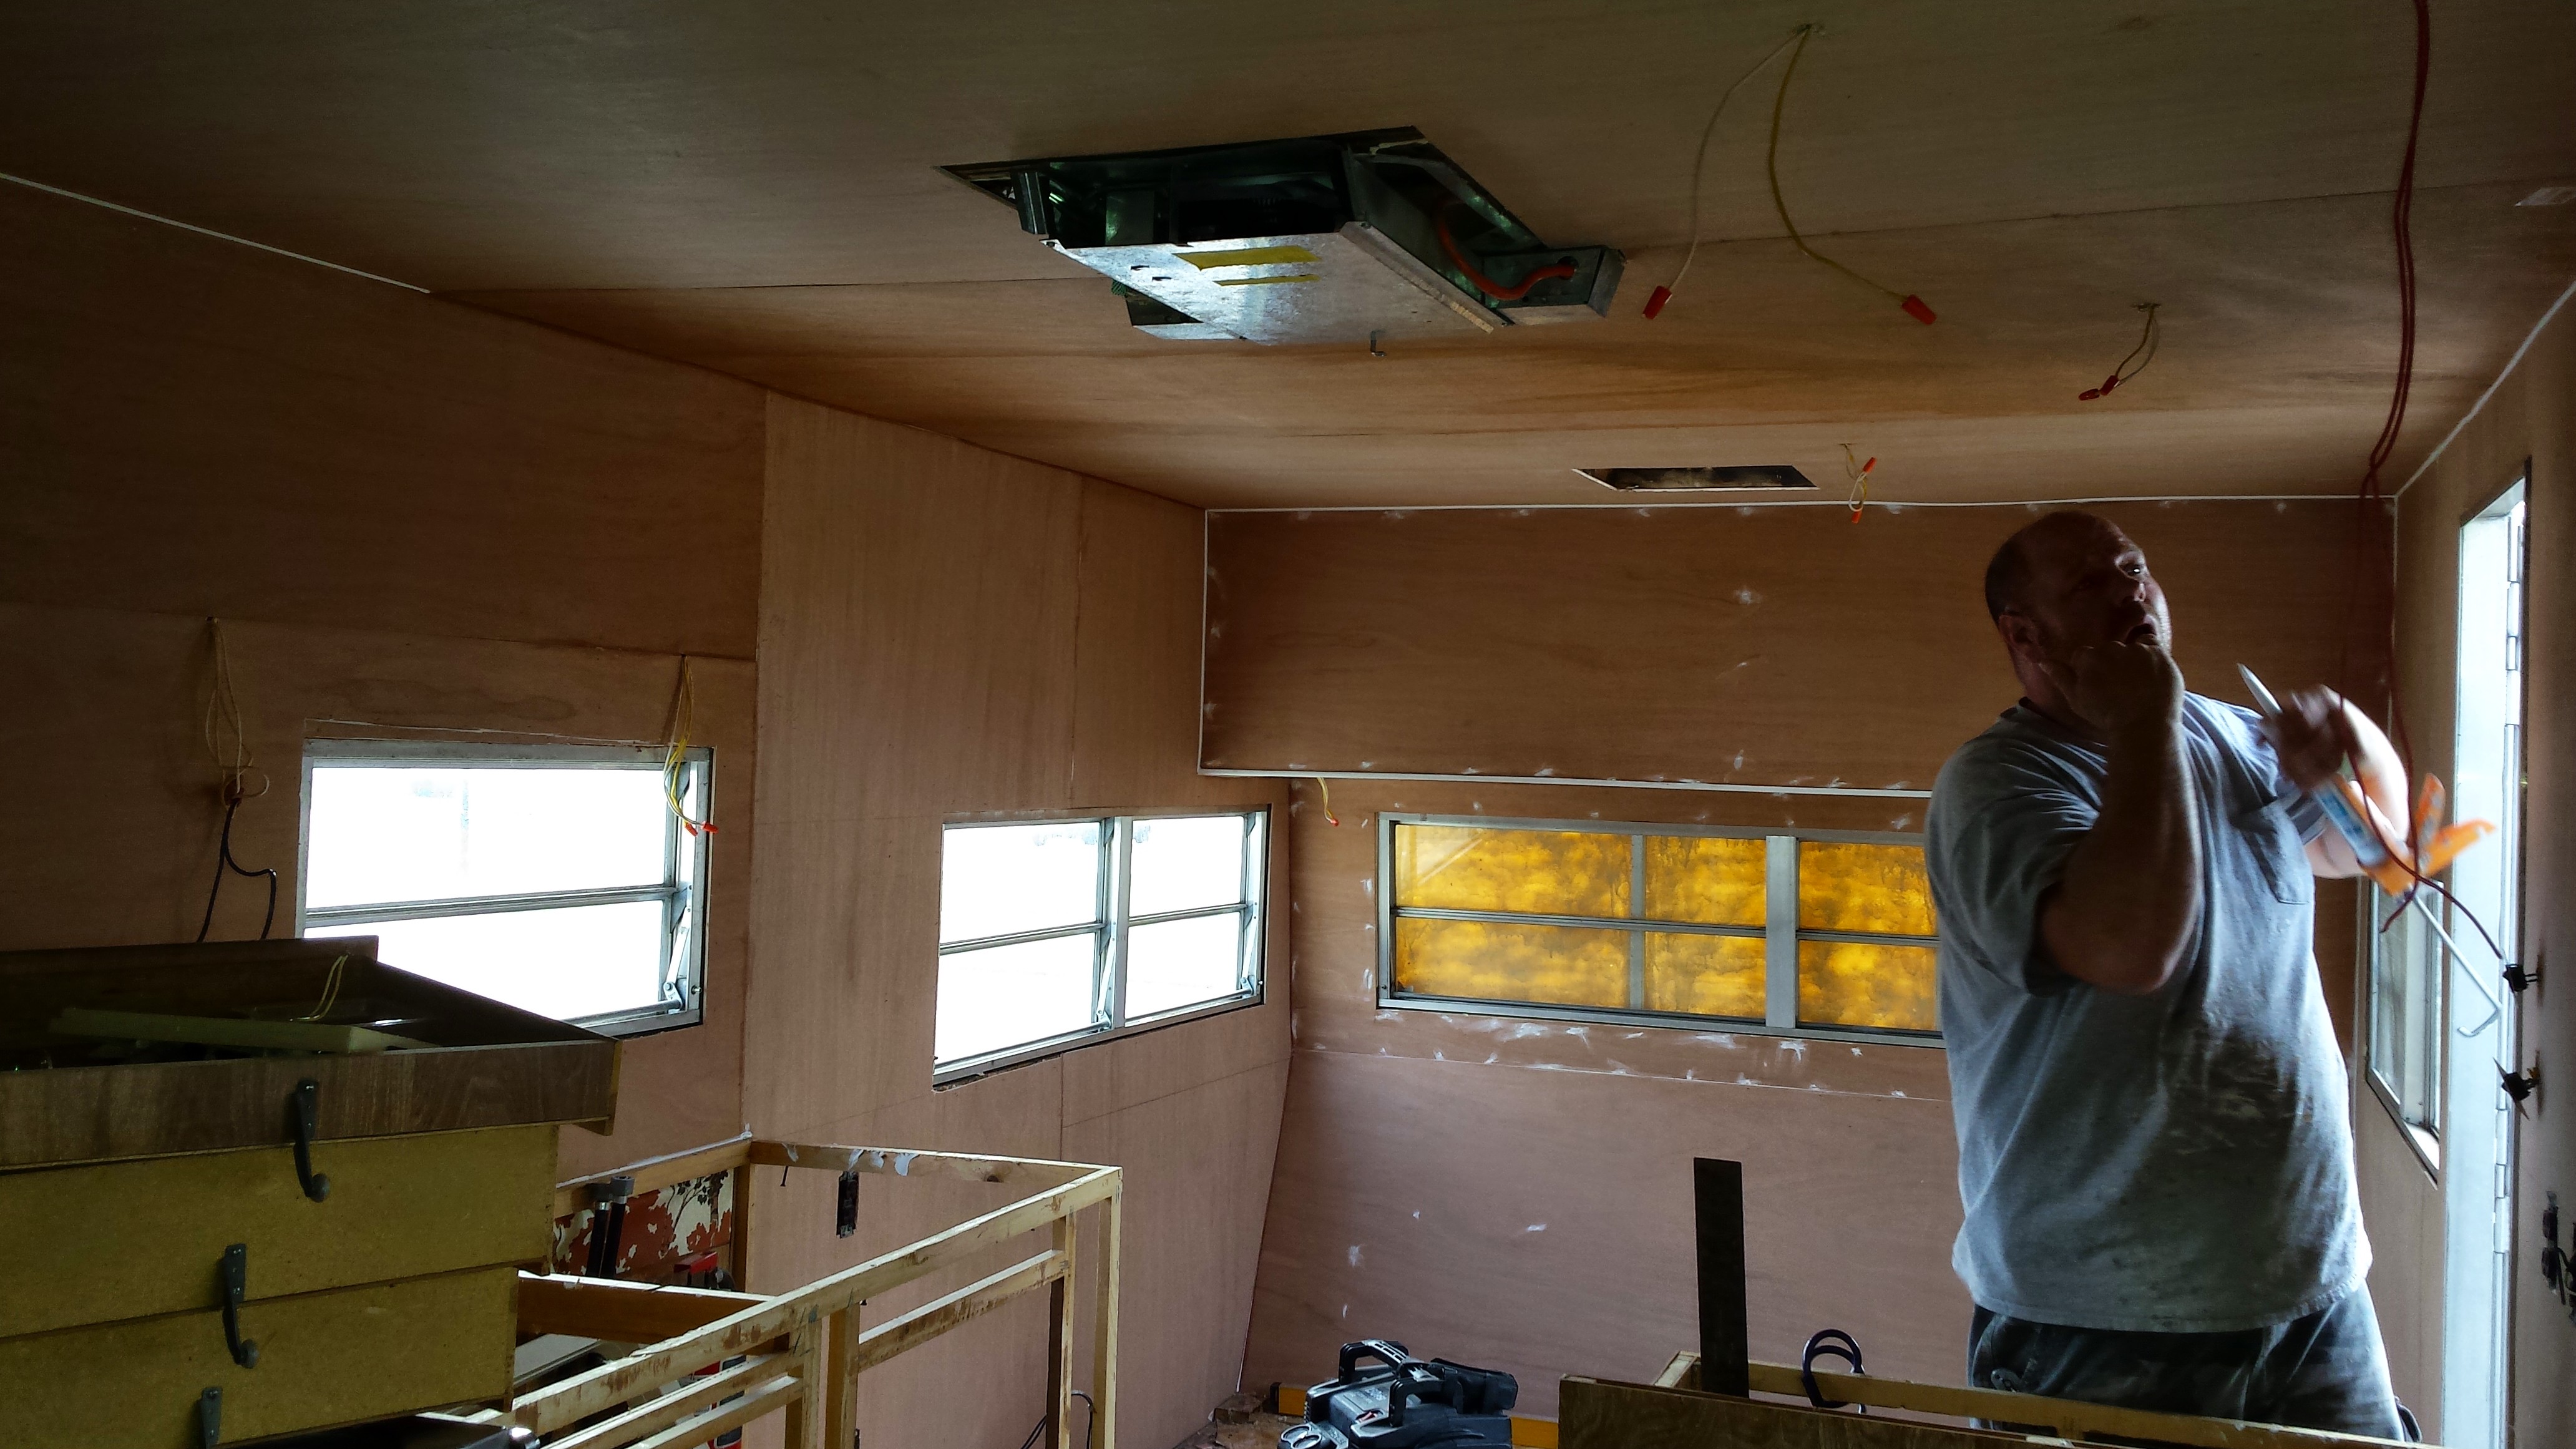
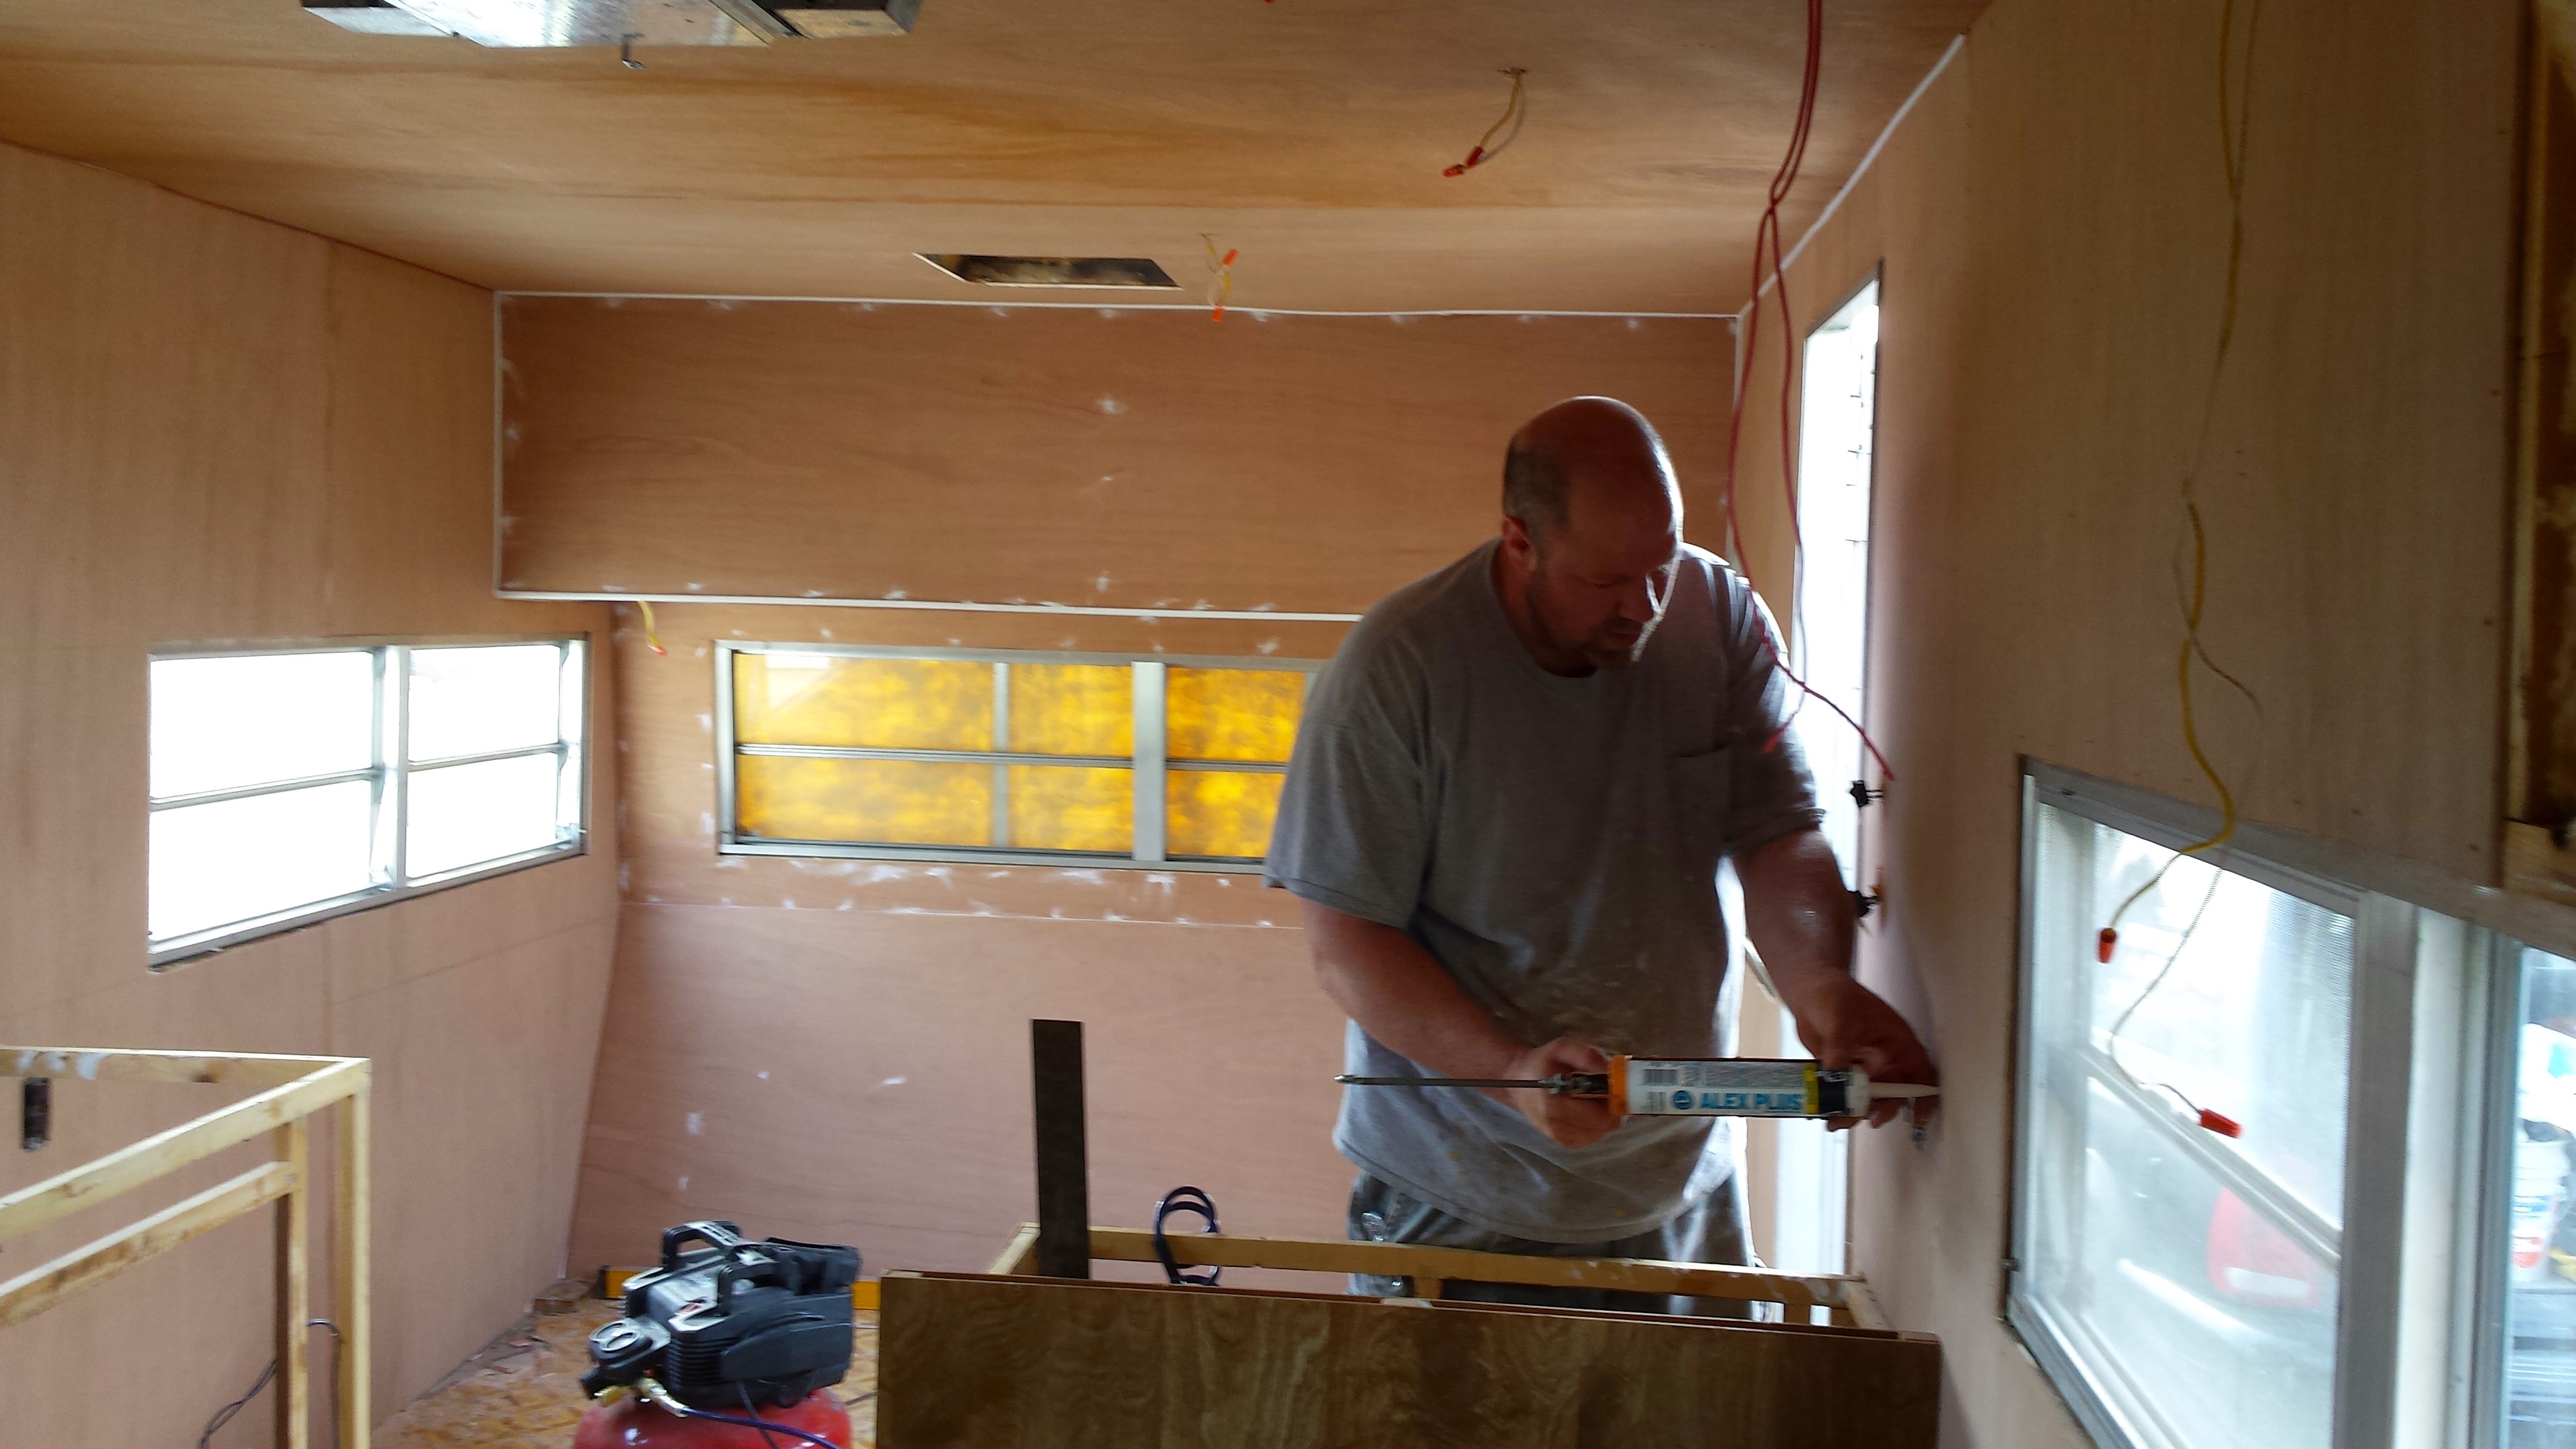
Once we did this, we were ready to prime. And we primed everything! The raw wood really soaked it up. We used Bulls Eye Primer from Rustoleum. A lot of it. The nice thing about priming everything? No cutting in, no worries about getting paint on something you shouldn’t.

I already had all my colors picked out. That’s one of my biggest downfalls. I set my mind on something and that’s what I want. So I took lots of samples; fabric, floor, paint chips..you name it. But don’t get your heart set on things. Be willing to be open minded, willing to make concessions…I didn’t so much, let to a lot of arguments. Moving on.
The one thing that did stay steady throughout was the paint colors. I had 2 picked out, they were next to each other on my paint chip and were neutral enough that I could pick my complimentary colors later. I picked “Agreeable Grey” and “Anew Grey” from Sherwin Williams. Seems appropriate. We bought latex…


 Don’t buy latex.
Here’s the thing…our latex paint stayed tacky…for like 2 weeks. So I went to the internet and it said we should use an oil based paint. Urgh. I had to realize this AFTER both colors were done. So I went back to the store and found oil based paints. The downfall I found with this is 1) you need paint thinner to wash your brushes 2) it stays wet for at least 24 hours 3) it only comes in glossy (at least that’s what the guy told me). So things are super shiny.
Soooo…I had to repaint…one color a day. That sucked. But it wasn’t tacky any more.
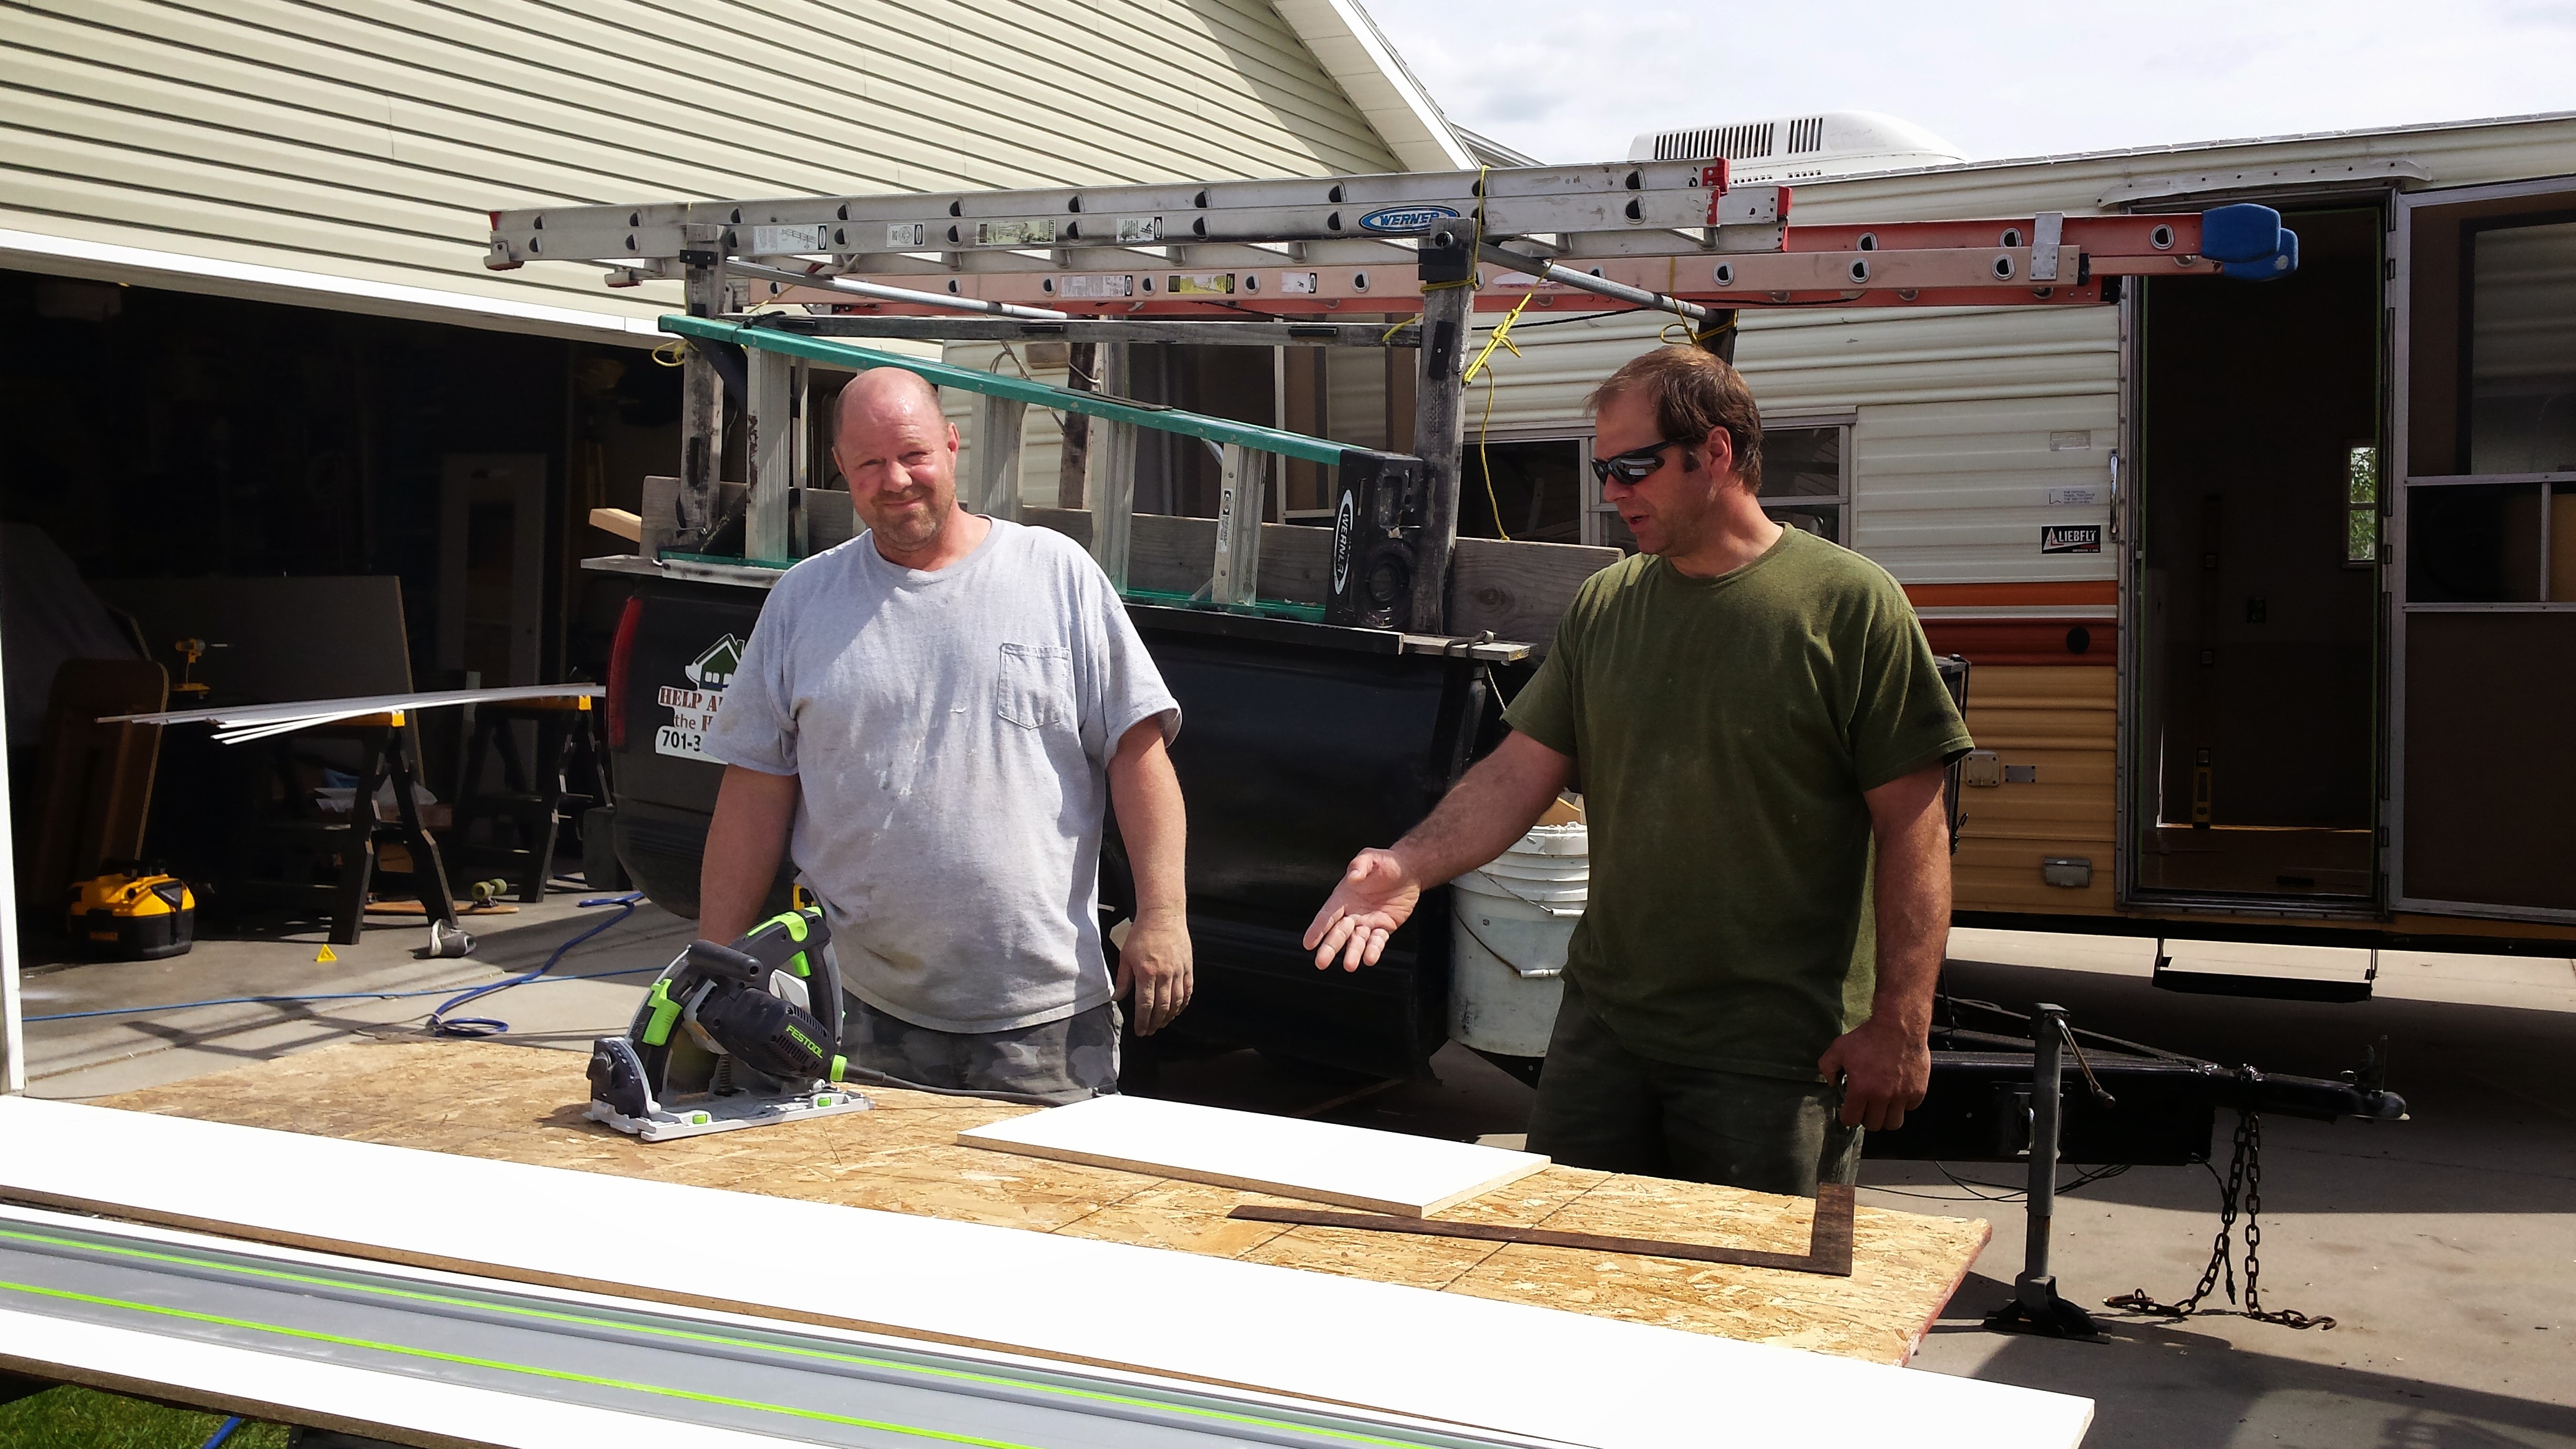
The next thing was cupboards. After looking at the space we needed to fill and how many we needed, not to mention color – we decided to build our own. Otherwise, they ran about $100 a shot and we’d need 4. I certainly wasn’t going to pay over $400 for cupboards. We used melamine with iron-on edging. Cut the cost almost in half. Getting them perfectly square was a challenge. And nicks along the edges can be more prominent on white. Shawn’s brother had some great tools to make the job easier, including a saw that ran on a track and a tool that cut the edges.
Needed help getting started, so enlisted Shawn’s older brother who does this stuff for a living.
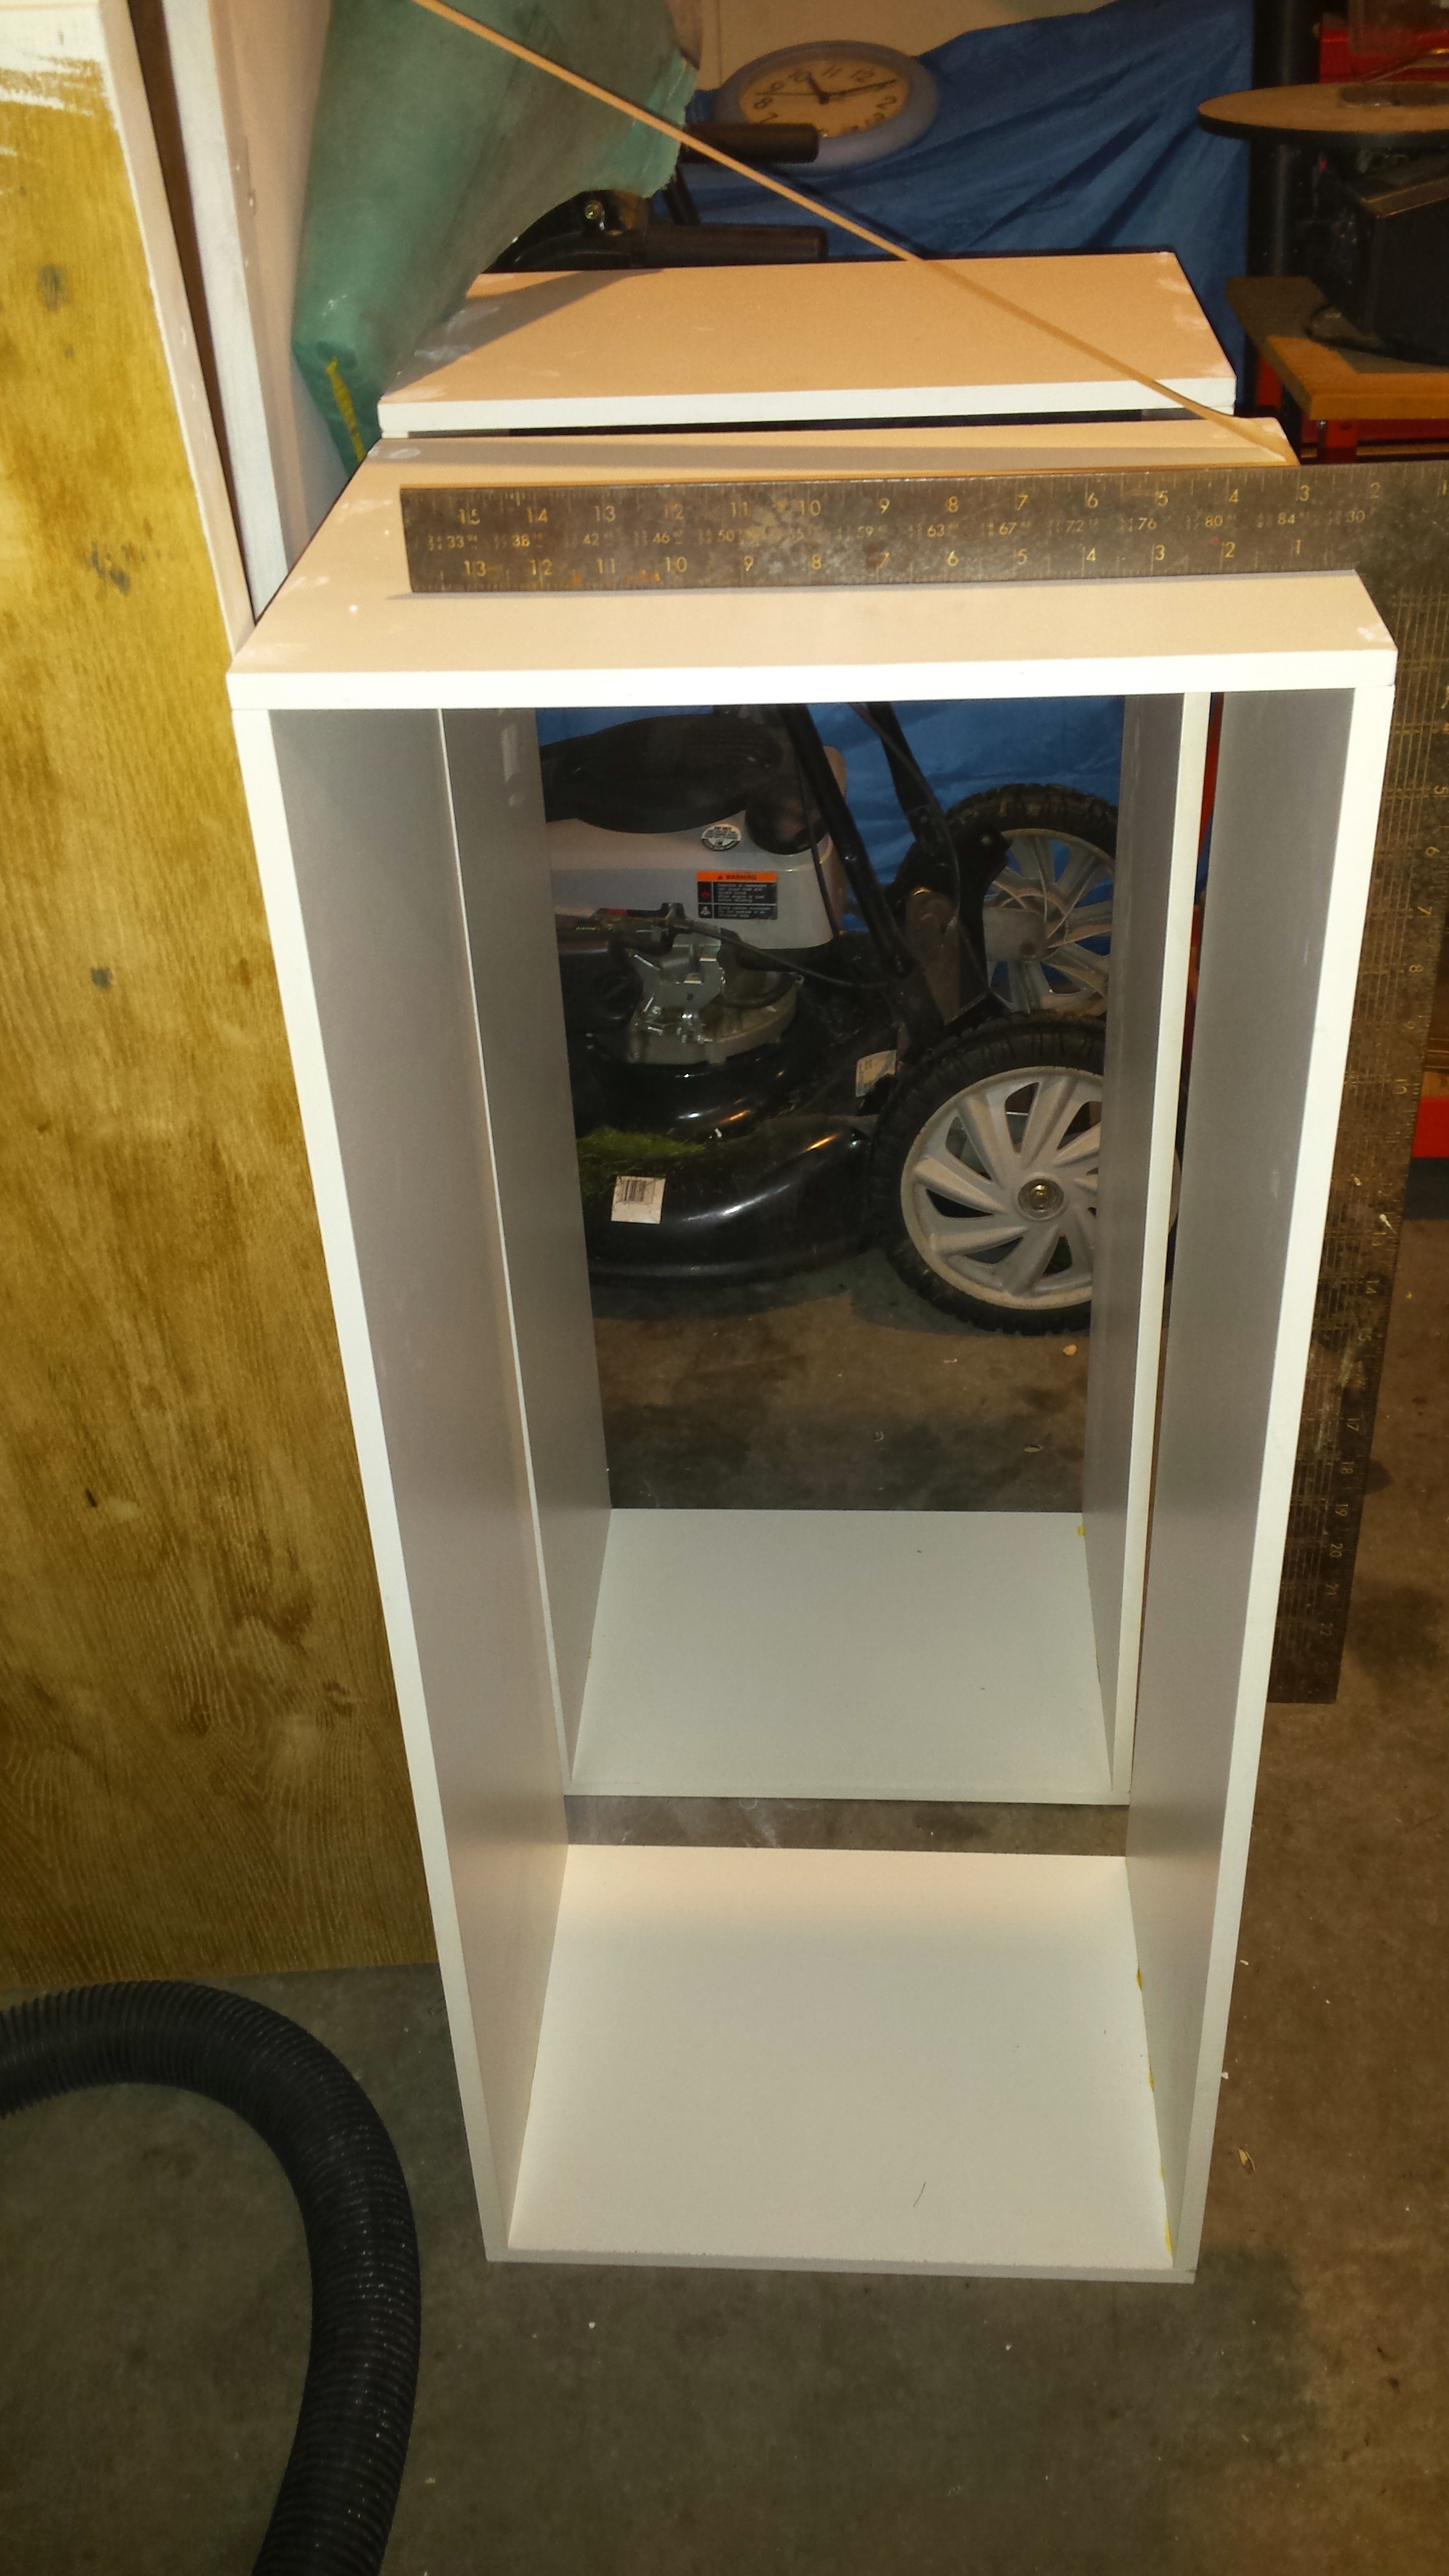
Keeping them level.

 Finished product. These are above the sink.

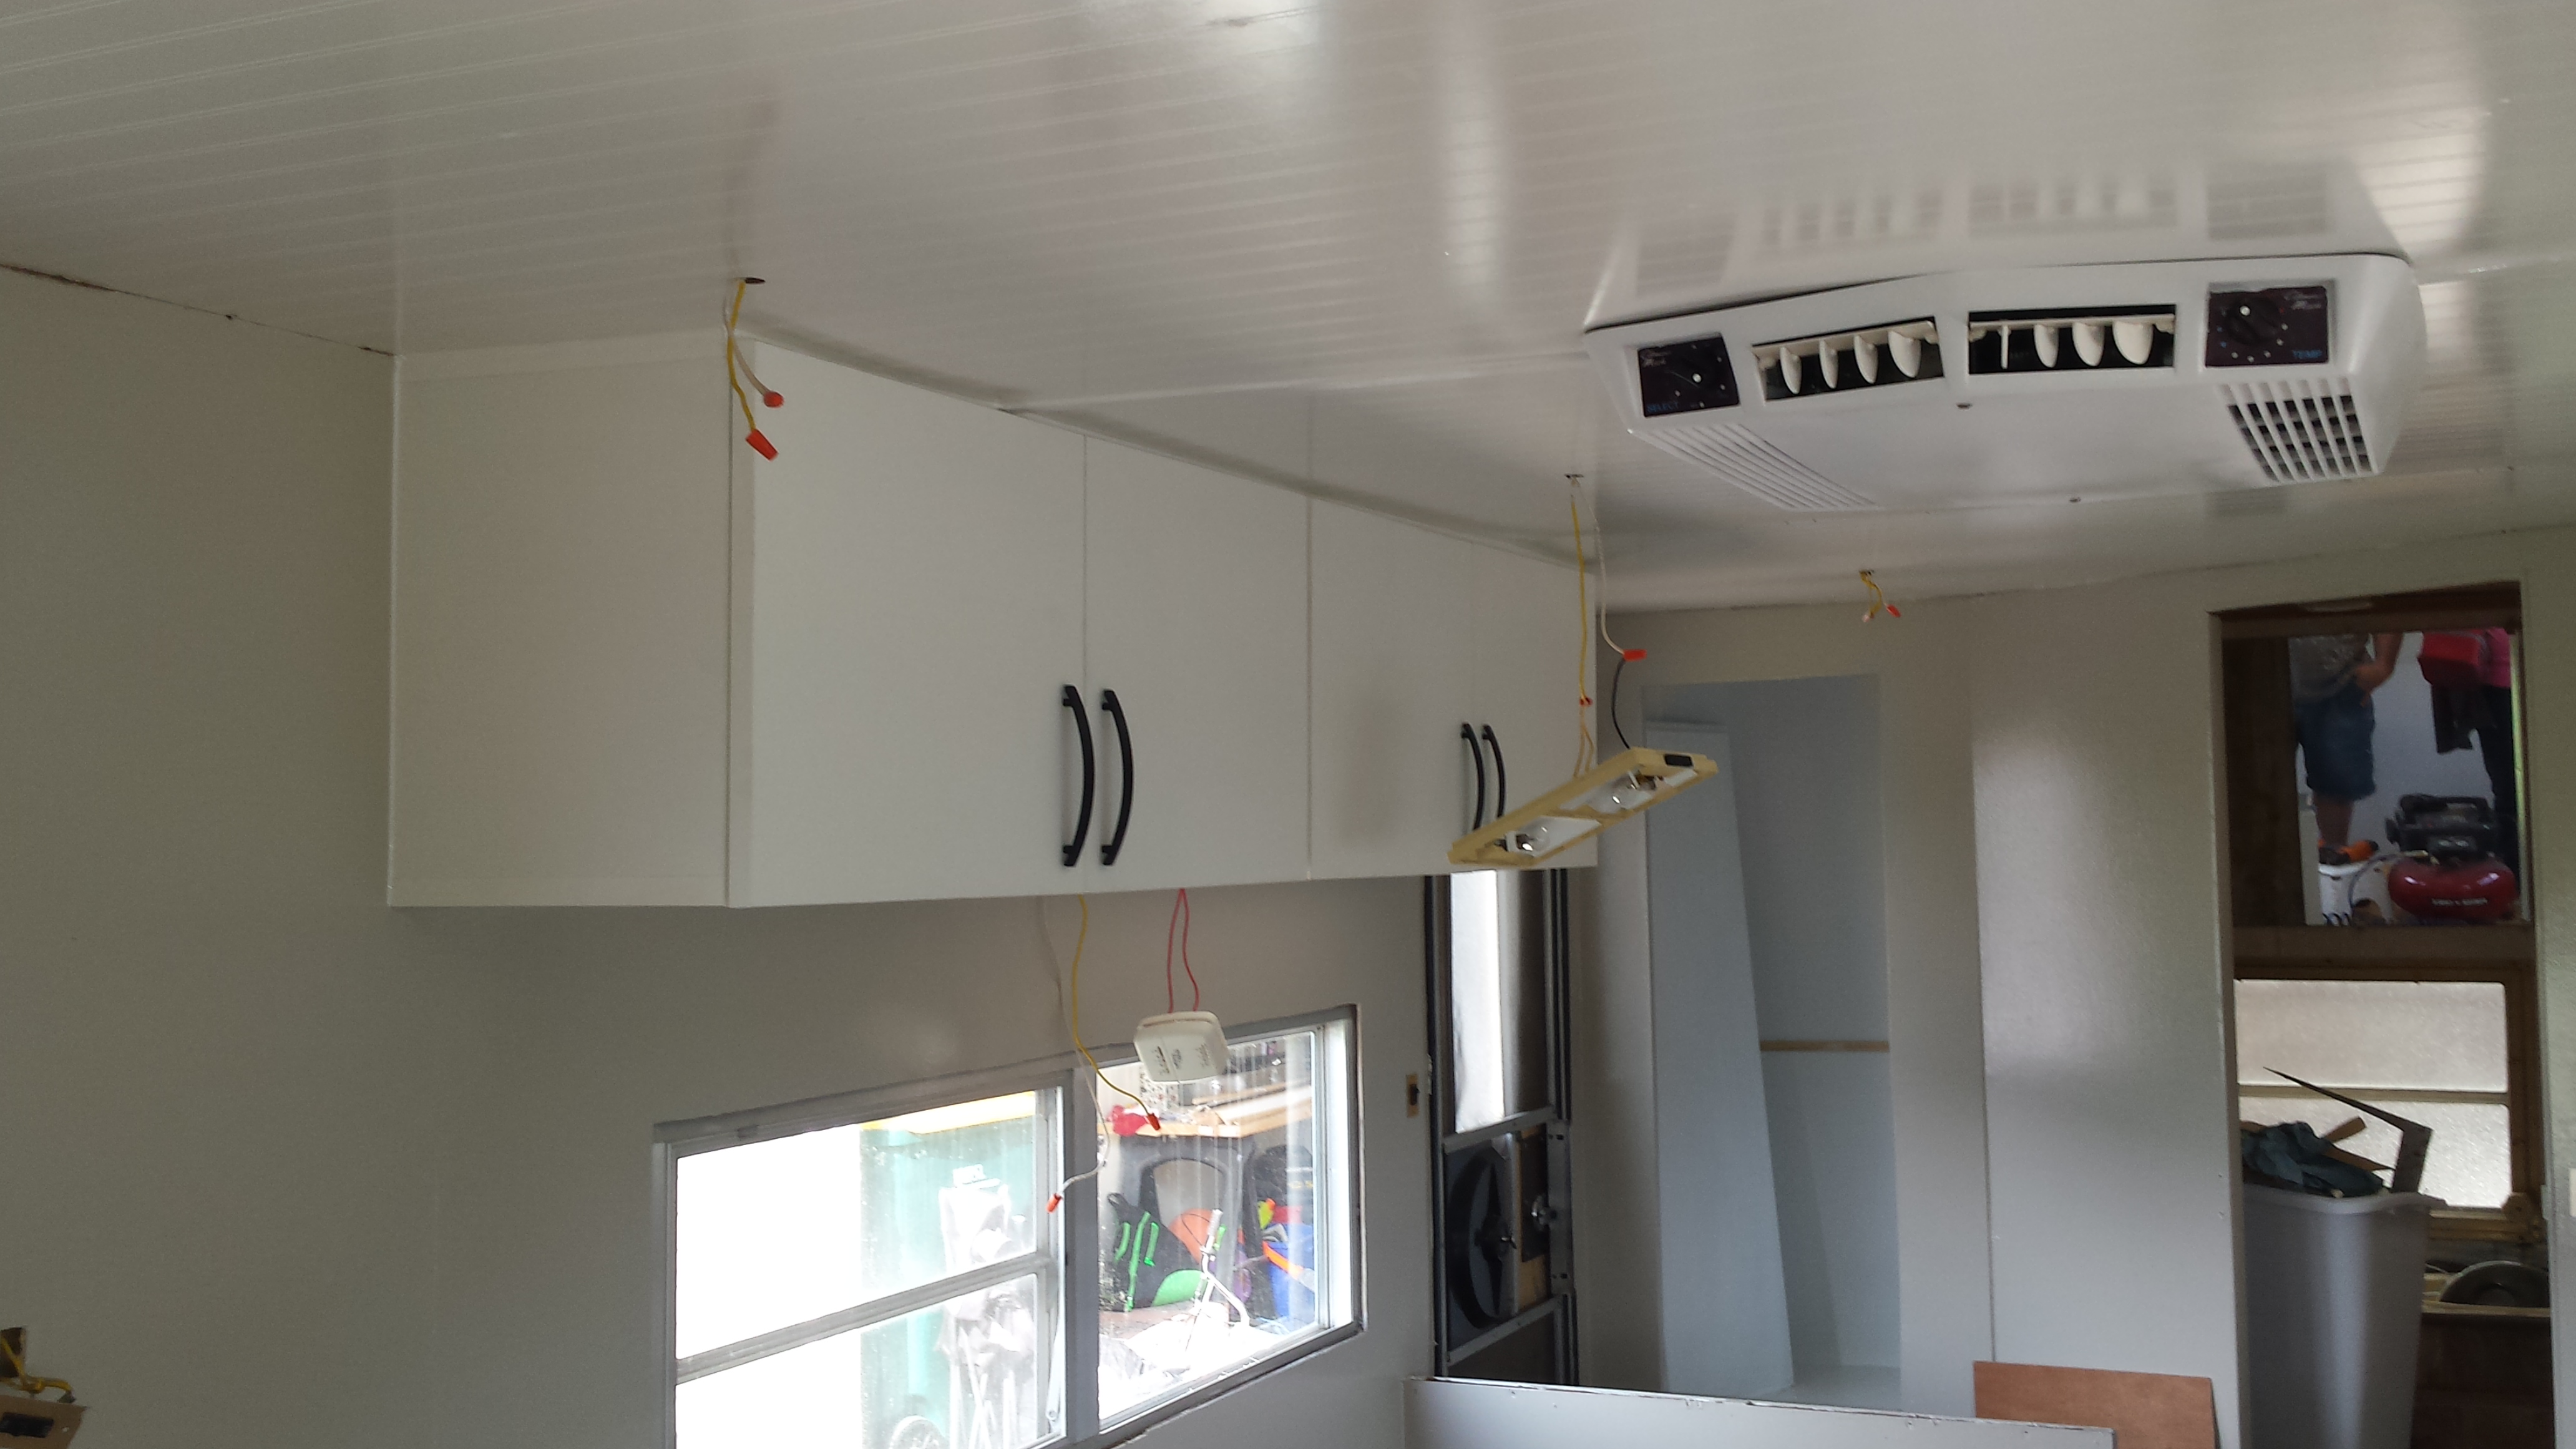 These are above the table. Holes were cut to allow wiring to come down.

Next came the counter top. Remember the concessions I told you about? This was one of them. In order to keep costs down, we had to choose from laminate counter tops that were kept in stock. But hey $60 for a 10 ft. piece? I think it was worth it.
Counter without sink in it:

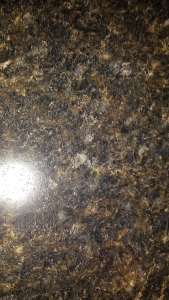
Closeup of colors – had to add some gold/browns into my color scheme after this.
Once the counter was in it was time for some fun things like fabric and tiles. I just took the old cushions and found a “no sew” way to recover them on pinterest. We did see that the peel and stick tile was supposed to be great for use in campers, but I went with traditional tile because I couldn’t find a stick on one that was what I like AND affordable.
I got vinyl fabric to recover the rails
Using a coupon from Joann’s Fabrics that allows you to take 50% off an item, and even more if you give them your email, allowed me to purchase all this fabric for only $40.

Tile choice for the area behind the seats.

This area.

This is what it looked like before grout.
Backsplash tile. This was on sale also at Home Depot.

We combined it with peel and stick tile to cut costs as well. The peel and stick was less than $1 a piece.


Then we cut a hole for the sink. We cleaned and reinstalled the old one.

Added a chair rail to create division between colors.
We had the microwave from a previous move, and a generous client that Shawn had done some work for gave him the refrigerator. It wasn’t working at the time, but it just needed a new fuse.
I was pretty proud of this. This is the same old crappy table that came with the camper. I primed it with gray and used black Rustolleum on top of that. I got 2 colors of metallic paint and dipped a plastic grocery bag in it and tapped it randomly on the table for the marble look. After that, we put something on it like a bar-top lacquer which made it really shiny. Also from pinterest.

One of the final steps was to add the flooring. It was the peel and stick kind as well. This was called “Iron Wood” and it was the one thing I did not compromise on. It really pulled everything together.


I love how this all came together.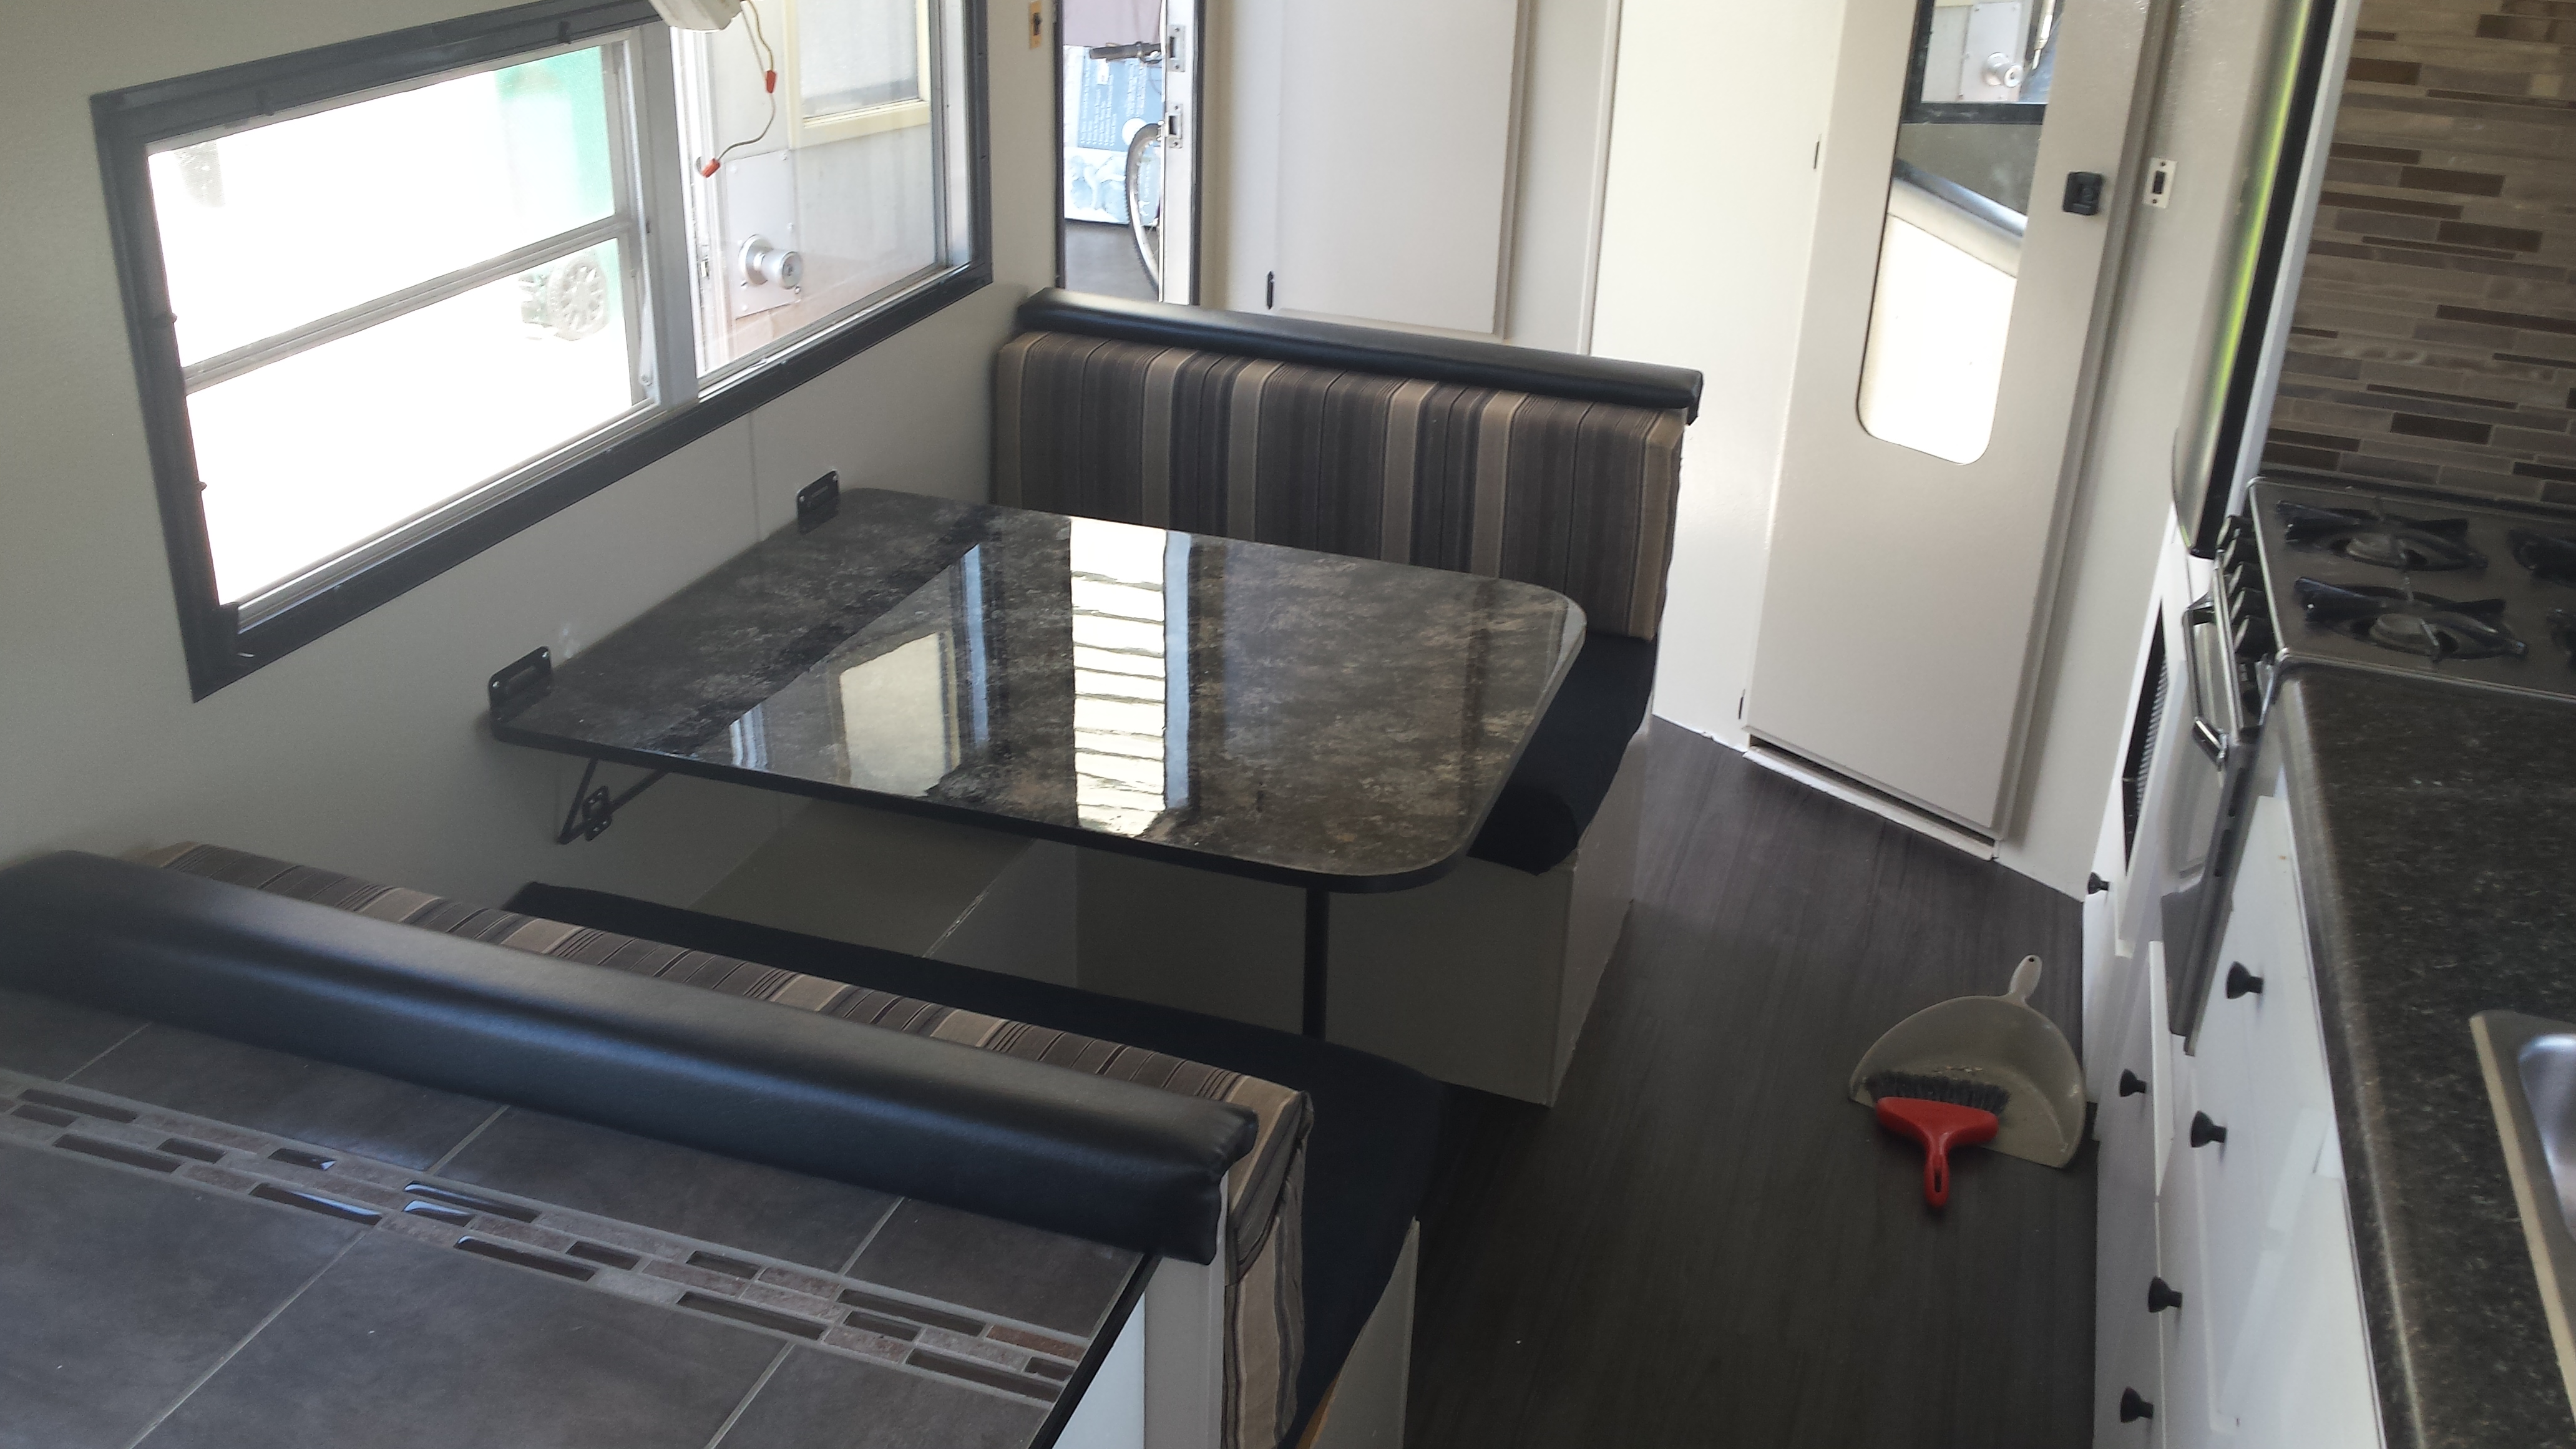
The curtains were the very last step and this will be the one thing that people will either love or hate. I wanted a pop of color and went very dramatic. I like it, but it will definitely not appeal to others. I was going to do a no sew curtain as well, but it didn’t go well. The fabric wouldn’t stick, or you could see the rough edge through it and the glue would soak through. So I dug out a sewing machine we had inherited, read the manual and attempted curtains. They certainly look homemade, but they’ll work for this.


The last thing we needed was a bed. After a lot of debate about whether to make one or buy one, we just opted for a futon. I couldn’t be happier and I’m sure it saved us from a lot of cussing. It was amazingly hard to find a queen size, so we went with a full size and I’m glad we did, it would have been too tight on the sides otherwise.

And now just as a reminder, before and afters! Let me know if you have any questions, and would love to hear comments as well!


Also, one more question. What kind of siding did you use for the inside walls?
LikeLike
I LOVE THIS ANG!!!!!!! What a wonderful facelift on a budget…looks expensively done !! Wonderful.
LikeLike
Such a gel test job and a lot of hard work to make this happen. We had a prowler with the same floor plan. But it had another large dinette up front that made into a large bed. Congrats on your hard work. We have camper camped for over 30 years.
LikeLike
Great job! We’re looking at buying a 79 Prowler. This gives me time of hope. Plus other stories online of people cleaning theirs up. We’re getting an 18 ft. Thanks for the inspiration!!!
LikeLike
Thank you for all the great ideas in this article! Gave us inspiration for our renovation on our travel trailer. Turning it into a “senior” trailer, kids are off on their own now. I love your flooring and wall info, we’ll be using that when we get rid of the kids end of the trailer. Thank you for all your cost-saving ideas!
LikeLike
Awesome! It looks great!
How long did it take to remodel the trailer?
LikeLike
About 3 1/2 months
LikeLike
We worked on it pretty consistently and it took about 4 months
LikeLike
Amazing job, it takes a lot of guts and courage and a tiny dab of crazy to rip into a water damaged camper. your end product is beautiful, hope you get a lot of use and enjoyment out of it. Camping with our two kids in a 1976 driver RV are the best memories of our lives.
LikeLike
I’m wondering how you did the ceiling. Did you replace it and the AC unit or did you just paint them? Thanks so much for sharing this. It really helps!
LikeLike
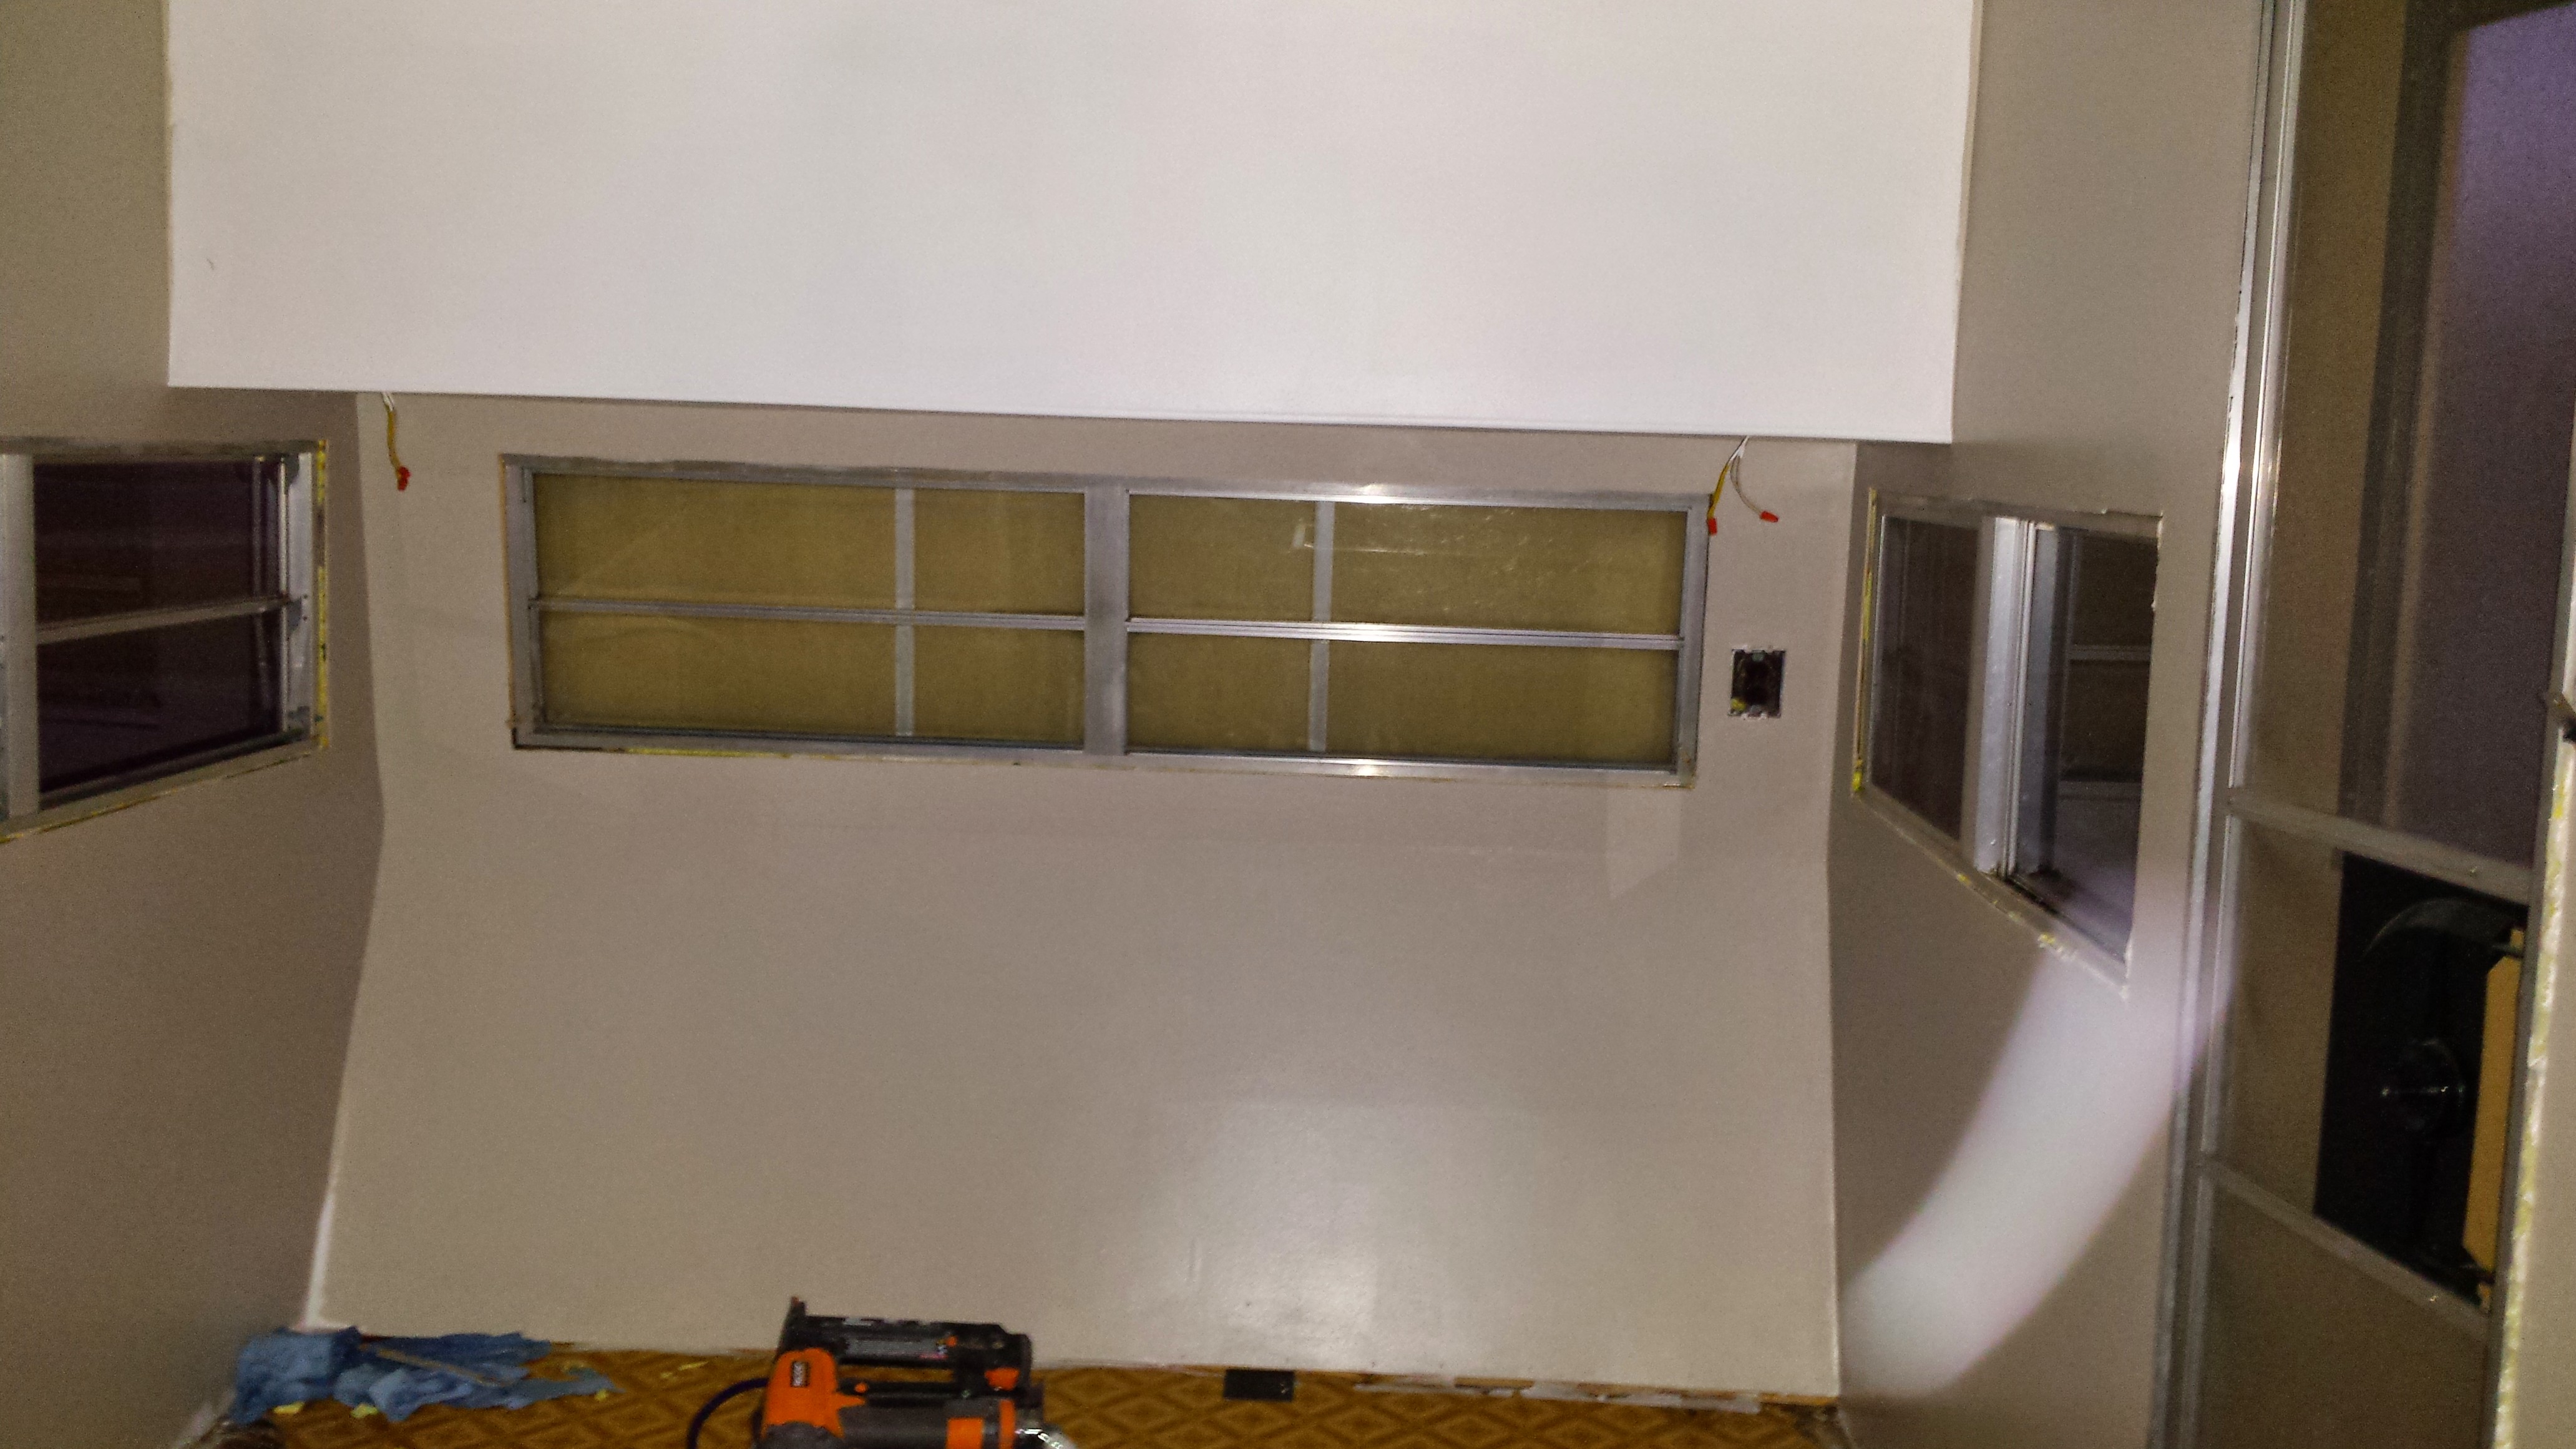
The ceiling is actually wainscoting. The airconditiner is the original, we took the outside cover off to put up the ceiling, then put the cover back up. It didn’t need to be repainted.
LikeLike
How much did it end up costing? I have this same camper that was left to me by my mom but it has some water damage on the roof so it definitely needs redone. Yours looks amazing!
LikeLike
I believe without redoing the bathroom it was less than $2000 -like maybe $1500? But it’s been awhile now.
LikeLike
Was gifted a 76 prowler from a family member. Been unused for years. We have our work cut out for us for sure! Very nervous but excited at the same time. Loved the article thank you so much for sharing! It has given us some ideas and a plan to start our project!
LikeLike
We got a prowler a few months ago. I didn’t even pay much attention too it until a week ago. We are moving to the coast. As I have been working on the outside lights to get working. What a pain but now I know how to do the wiring from the SUV to the end of the prowler. I just wished I would had started when we got it. Its going to be a job in half for me . I just want to thank you for your story and can I borrow your husband and brother in law. I promise to give them back.
LikeLike
Good luck! We are just now getting around to remodeling the bathroom!
LikeLike
What did you use for the insulation and do you have any pics of bathroom it’s was remodeled into an office and i can’t figure out where anything was , before
LikeLike
Sorry, ours was remodeled into an office before we got it
LikeLike
Where did you buy the ironwood flooring? It’s awesome! You did an amazing job. It makes me want to take on the challenge to spruce ours up! Thanks!!
LikeLike
It’s just vinyl flooring that we bought at home depot
LikeLike
Amazing job! Did you guys have it tested for asbestos? I saw another tutorial where they had a trailer manufactured in the early 60s tested because of some of the materials that had been used. We have a 1965 Aristocrat Commander and are going to begin work on it. Thanks!
LikeLike
We did the same thing. Was told it was real good shape. Turned out it had sat in flood waters. We did the same as you and lived in it for 4 years while in college. Miss it!
LikeLike
I love it al especially the green curtains
LikeLike